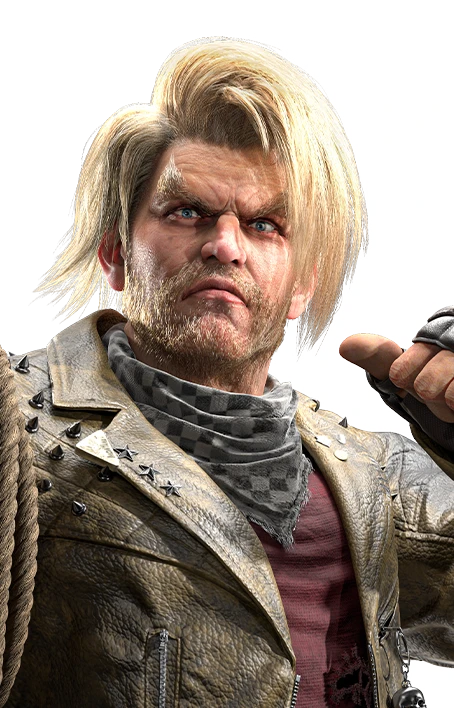
Character reference · Tekken 8

Paul

Good buttons. Bad habits. Combos that do the job.

143 moves317 documented routesFirst match with Paul ↗
Paul

Start with these

Your quick kit

Short options. No twenty-minute lecture.

After a standing block

1,2Left Right Combo
h ,hi10-3 on block5 ,12 damage

Move can be delayed 3f Input can be delayed 3f Combo from 1st hit with 3f delay Jail from 1st attack with 3f delay

Source-listed 10-frame standing punish. Use after blocking a move that is -10 or worse, within reach.

After blocking a low

db+1Dickjab
sli10-5 on block5 damage

Transition to r24 standing with f

Source-listed 10-frame crouching punish. Use after blocking a move that is -10 or worse, within reach.

Mid check

d+1Hammer Punch
mi14-9 on block16 damage

Spike Transition to r27 FC with d

A single mid to check a crouching opponent. Return to blocking after it is defended.

Low option

b+4Leg Sweep
Li20-12c on block14 damage

Use sparingly to challenge standing guard. Check the block value before committing.

More character tools 21 source-selected moves
1Left Jab
hi10+1 on block5 damage

Recovers 2f faster on hit or block (t27 r17)

poke · corekeepout · core
1,2Left Right Combo
h ,hi10-3 on block5 ,12 damage

Move can be delayed 3f Input can be delayed 3f Combo from 1st hit with 3f delay Jail from 1st attack with 3f delay

poke · core
df+1~b
mi14+3 on block11 damage

Sidestep u can be buffered from 16f SWA attacks can be buffered from 24f Transition to cs1~ r9 -1 -12 DPD from 32f with df

mixup · core
df+1,1,2Lion's Roar
m,h ,mi14-9 on block11,9 ,22 damage

Balcony Break Combo from 2nd CH Interrupt with i3 from 2nd block

mixup · core
ws1,2~b
m,mi15+1 on block16,17 damage

Sidestep u can be buffered from 44f SWA attacks can be buffered from 51f Transition to cs1~ r9 -10 +4 +5 DPD from 60f with df

poke · coremixup · secondarycounter · secondary
df+4Tiger Claw
mi17-2 on block17 damage

Knee

approach · corecounter · core
f+1+2Hammer of the Gods
mi20+3c on block22 damage

Balcony Break (CH only) Chip damage (4) Move can be delayed 9f (i29~30) Delayed startup from 5~23f charge f+1+2* at 24f charge H.f+1+2* at 24f charge Transition to ±0, +5c DPD with DF

approach · core
CS.3+4Mountain Raze
mi19-9 on block22 damage

Tornado Balcony Break Knee High Evasion (brief) Sometimes written qcf+3+4

approach · core
CS.3Gengetsu
Li18-14c on block18 damage

Clean hit range 2.0 17 damage on hit without Clean Hit +7 on CH without Clean Hit Sometimes written qcf+3

poke · corekeepout · coreoki · secondarycounter · extra
SS.3Pump In Pedal
Li19-12c on block17 damage

Effective minimum startup 28f

poke · coreoki · extracounter · extra
CS.2Phoenix Smasher
mi13-17 on block45 damage

Heat Engager Balcony Break H.CS.2 with Heat Clean Hit range 2.3 30 damage without Clean Hit Sometimes written qcf+2 Deathfist

mixup · coreapproach · core
d+4,2:1+2Demolition Man (Perfect Input)
L,m ,mi15-17 on block9,23 ,30 damage

Balcony Break Move can be delayed 1f Input can be delayed 1f Combo from 1st CL with 1f delay +13d (+6) Combo from 1st CH with 1f delay +13d (+6) Combo from 2nd hit with 1f delay +13d (+6) Perfect input window 21~22f after 2 input Perfect input increases damage, wall carry Move cannot be interrupted

mixup · coreapproach · core
3Left Kick
mi15-7 on block14 damage
keepout · corepoke · core
f+4Stone Lion
mi22-5 on block24 damage

Heat Engager Heat Dash +43d (+35) Homing

keepout · core
d+1Hammer Punch
mi14-9 on block16 damage

Spike Transition to r27 FC with d

poke · corekeepout · coremixup · extra
df+3,4Phoenix Wings
m ,mi16-10 on block14 ,17 damage

Move can be delayed 10f Input can be delayed 13f Combo from 1st hit with 9f delay Interrupt with i4 from 1st block Whiffs vs SSR from 1st block

keepout · secondarycounter · secondarypoke · secondary
SWA.2Rubber Band Attack
mi15-9 on block27 damage

Heat Engager Heat Dash +5, +36a (+26) Clean Hit range 2.45 Heat Dash disables Clean Hit 21 damage without Clean Hit Sometimes written qcb+2

poke · corekeepout · core
SWA.4Kawaragoma
hi15+1 on block17 damage

Homing Chip damage (6) Sometimes written qcb+4

keepout · secondarycounter · corepoke · secondary
b+4Leg Sweep
Li20-12c on block14 damage
poke · secondarycounter · extraoki · core
db+2Shoot the Moon
Mi19-11 on block21 damage

Tornado Balcony Break

counter · coreoki · core
H.1+2Half-Step Phoenix Smasher
mi28-9 on block35 damage

Balcony Break Reversal Break Consumes Heat unless canceled Chip damage (10) Move can be delayed 11f (i39) Charge begins on frame 1 Requires 1~27f charge Delayed startup from 17~27f charge Cancel to t27~35 r1 CS from 17~35f with f Sidestep u can be buffered 2f after cancel CS attacks can be buffered from 26f Decaying 13f delay on CS attacks Decays to 0 delay 24f after cancel Cancel to t41~49 r12 SWA from 17~35f with b Sidestep u can be buffered from 27f SWA attacks can be buffered from 26f H.1+2* from 28~55f charge Burning Fist at 56f charge

mixup · coreapproach · secondary

Make the launch count

Go-to routes

Common routes first. Save your favorites with ☆.
Bread n' butter

Regular Launch Example

[72] df+2 4 df+4 3,2~b~DF DPD.2,1 T! DPD.1 wr2Source ↗
Bread n' butter

Regular Launch Example

[70] df+2 3,2 3,2~b~DF DPD.2,1 T! DPD.1 wr2Source ↗
Bread n' butter

Regular Launch Example

[66] df+2 4 df+4 3,2~b SWA.1+2 T! DPD.1 wr2Source ↗
Full combo library 317 documented routes

CH = counter hit · T! = Tornado · W! = wall splat · H. = Heat. Bracketed numbers are the source's damage annotations, not always total damage. Starter conditions and notes apply.

Bread n' butter

Regular Launch Example

[72] df+2 4 df+4 3,2~b~DF DPD.2,1 T! DPD.1 wr2Source ↗
Bread n' butter

Regular Launch Example

[70] df+2 3,2 3,2~b~DF DPD.2,1 T! DPD.1 wr2Source ↗
Bread n' butter

Regular Launch Example

[66] df+2 4 df+4 3,2~b SWA.1+2 T! DPD.1 wr2Source ↗
Bread n' butter

Regular Launch Example

[64] df+2 3,2 3,2~b SWA.1+2 T! DPD.1 wr2Source ↗
Bread n' butter

Low Launch Example

[77] ws2 3,2 3,2~b~DF> DPD.2,1 T! DPD.1 wr2Source ↗
Bread n' butter

Low Launch Example

[74] ff+4 ws3 3,2~b~DF DPD.2,1 T! DPD.1 wr2Source ↗
Bread n' butter

Low Launch Example

[73] b+3 3,2 3,2~b~DF DPD.2,1 T! DPD.1 wr2Source ↗
Bread n' butter

Low Launch Example

[71] ws2 3,2 3,2~b SWA.1+2 T! DPD.1 wr2Source ↗
Bread n' butter

Low Launch Example

[68] ff+4 ws3 3,2~b SWA.1+2 T! DPD.1 wr2Source ↗
Bread n' butter

Low Launch Example

[67] b+3 3,2 3,2~b SWA.1+2 T! DPD.1 wr2Source ↗
Mini-combos

CH d+1+2

[69] CL qcf+2

Approach for Clean Hit with microdash only / Only possible when d+1+2 trades with a small attack

Source ↗
Mini-combos

CH d+1+2

[57] qcf+2

Only possible when d+1+2 trades with a small attack

Source ↗
Mini-combos

CH f+1+2

[62] CL qcf+2

CH f+1+2: Can also be done with the Deep Dive transition, but requires a crouch cancel / Approach for Clean Hit with microdash only

Source ↗
Mini-combos

CH f+1+2

[50] qcf+2

CH f+1+2: Can also be done with the Deep Dive transition, but requires a crouch cancel

Source ↗
Mini-combos

CH f+1+2

[48] dash d+1+2

CH f+1+2: Can also be done with the Deep Dive transition, but requires a crouch cancel

Source ↗
Mini-combos

qcf+3+4

[58] CL qcf+2

Approach for Clean Hit with microdash or extended QCF

Source ↗
Mini-combos

(df+1,1),2

[58] CL qcf+2

Approach for Clean Hit with microdash only / Easier if opponent does not tech roll right; otherwise only hits average sized characters and bigger

Source ↗
Mini-combos

CH (df+1),1,2

[68] CL qcf+2

Approach for Clean Hit with microdash only / Easier if opponent does not tech roll right; otherwise only hits average sized characters and bigger

Source ↗
Mini-combos

CH (df+1),1,2

[54] dash d+1+2Source ↗
Mini-combos

SS.1

[57] CL qcf+2

Approach for Clean Hit with microdash or extended QCF

Source ↗
Mini-combos

db+1+2

[57] CL qcf+2

Approach for Clean Hit with microdash only / Only possible if opponent does not tech roll right, Paul is close enough to the wall, or the move trades with a small attack

Source ↗
Mini-combos

db+1+2

[43] dash d+1+2

Use if off-axis for qcf+2

Source ↗
Mini-combos

CH (df+3),4

[51] b+1,2

CH (df+3),4: Wall only / Whiffs on smaller characters

Source ↗
Mini-combos

CH (df+3),4

[48] d+1+2

CH (df+3),4: Wall only

Source ↗
Mini-combos

CH qcf+3

[59] db+2 T! qcf+2

Wall only / Does not work on Jack

Source ↗
Mini-combos

CH qcf+3

[36] OTG.d+2

Floor Break

Source ↗
Mini-combos

CH df+4

[43] f+2

Heat Engager

Source ↗
Mini-combos

CH (ws1),2~b

[43] f+2

Heat Engager

Source ↗
Mini-combos

CH (ws1),2~b

[38] SWA.2

Heat Engager

Source ↗
Mini-combos

CH DPD.4

[36] db+2

Clean hit deals 40

Source ↗
Mini-combos

H.b+2,1* GB / H.d+1,2* GB

[21] b+1,2

H.b+2,1* GB: Guard break deals 7 chip damage normally, or 2 when opponent is in rage / H.d+1,2* GB: Guard break deals 11 chip damage normally, or 3 when opponent is in rage

Source ↗
Mini-combos

H.b+2,1* GB / H.d+1,2* GB

[19] d+1+2

H.b+2,1* GB: Guard break deals 7 chip damage normally, or 2 when opponent is in rage / H.d+1,2* GB: Guard break deals 11 chip damage normally, or 3 when opponent is in rage

Source ↗
Staples

b+3

[78] ws4 df+4 2 dash 3,2~b~DF DPD.2,1 T! DPD.1 wr2

Can be done either with a SSL before the WS4 or a longer CD input

Source ↗
Staples

b+3

[75] 3,2 2 dash 3,2~b~DF DPD.2,1 T! DPD.1 wr2Source ↗
Staples

b+3

[75] 3 df+4 2 dash 3,2~b~DF DPD.2,1 T! DPD.1 wr2Source ↗
Staples

b+3

[72] ws4 df+4 2 dash 3,2~b SWA.1+2 T! DPD.1 wr2

Can be done either with a SSL before the WS4 or a longer CD input

Source ↗
Staples

b+3

[69] 3,2 2 dash 3,2~b SWA.1+2 T! DPD.1 wr2Source ↗
Staples

df+2 / uf+4

[78] qcf+1 df+4 df+1 dash 3,2~b~DF DPD.2,1 T! DPD.1 wr2Source ↗
Staples

df+2 / uf+4

[78] qcf+1 df+4 df+1~b~DF WS1,2~b~DF DPD.2,1 T! DPD.1 wr2Source ↗
Staples

df+2 / uf+4

[77] qcf+1 df+4 2 dash 3,2~b~DF DPD.2,1 T! DPD.1 wr2Source ↗
Staples

df+2 / uf+4

[75] ws4 df+4 2 dash 3,2~b~DF DPD.2,1 T! DPD.1 wr2Source ↗
Staples

df+2 / uf+4

[74] 4 df+4 2 dash 3,2~b~DF DPD.2,1 T! DPD.1 wr2Source ↗
Staples

df+2 / uf+4

[72] 3,2 2 dash 3,2~b~DF DPD.2,1 T! DPD.1 wr2Source ↗
Staples

df+2 / uf+4

[72] qcf+1 df+4 df+1~b~DF WS1,2~b SWA.1+2 T! DPD.1 wr2Source ↗
Staples

df+2 / uf+4

[71] qcf+1 df+4 2 dash 3,2~b SWA.1+2 T! DPD.1 wr2Source ↗
Staples

df+2 / uf+4

[69] ws4 df+4 2 dash 3,2~b SWA.1+2 T! DPD.1 wr2Source ↗
Staples

df+2 / uf+4

[68] 4 df+4 2 dash 3,2~b SWA.1+2 T! DPD.1 wr2Source ↗
Staples

df+2 / uf+4

[66] 3,2 2 dash 3,2~b SWA.1+2 T! DPD.1 wr2Source ↗
Staples

uf+3,4

[75] df+4 2 dash 3,2~b~DF DPD.2,1 T! DPD.1 wr2

Only works up close

Source ↗
Staples

uf+3,4

[71] 3,2 dash 3,2~b SWA.1+2 T! DPD.1 wr2Source ↗
Staples

uf+3,4

[67] dash ws4 df+4 b+1,2 T! DPD.1 wr2Source ↗
Staples

uf+3,4

[65] 3,2 b+1,2 T! DPD.1 wr2Source ↗
Staples

uf+3

[78] ws4 df+4 df+1 dash 3,2~b~DF DPD.2,1 T! DPD.1 wr2Source ↗
Staples

uf+3

[77] ws4 df+4 2 dash 3,2~b~DF DPD.2,1 T! DPD.1 wr2Source ↗
Staples

uf+3

[74] 3,2 2 dash 3,2~b~DF DPD.2,1 T! DPD.1 wr2Source ↗
Staples

uf+3

[71] ws4 df+4 2 dash 3,2~b SWA.1+2 T! DPD.1 wr2Source ↗
Staples

uf+3

[68] 3,2 2 dash 3,2~b SWA.1+2 T! DPD.1 wr2Source ↗
Staples

(uf+3),4

[80] qcf+1 df+4 df+1 dash 3,2~b~DF DPD.2,1 T! DPD.1 wr2

Smaller window to land than df+2

Source ↗
Staples

(uf+3),4

[80] qcf+1 df+4 df+1~b~DF WS1,2~b~DF DPD.2,1 T! DPD.1 wr2

Smaller window to land than df+2

Source ↗
Staples

(uf+3),4

[79] qcf+1 df+4 2 dash 3,2~b~DF DPD.2,1 T! DPD.1 wr2

Smaller window to land than df+2

Source ↗
Staples

(uf+3),4

[77] ws4 df+4 2 dash 3,2~b~DF DPD.2,1 T! DPD.1 wr2Source ↗
Staples

(uf+3),4

[76] 4 df+4 2 dash 3,2~b~DF DPD.2,1 T! DPD.1 wr2Source ↗
Staples

(uf+3),4

[74] 3,2 2 dash 3,2~b~DF DPD.2,1 T! DPD.1 wr2Source ↗
Staples

(uf+3),4

[74] qcf+1 df+4 df+1~b~DF WS1,2~b SWA.1+2 T! DPD.1 wr2

Smaller window to land than df+2

Source ↗
Staples

(uf+3),4

[73] qcf+1 df+4 2 dash 3,2~b SWA.1+2 T! DPD.1 wr2

Smaller window to land than df+2

Source ↗
Staples

(uf+3),4

[71] ws4 df+4 2 dash 3,2~b SWA.1+2 T! DPD.1 wr2Source ↗
Staples

(uf+3),4

[70] 4 df+4 2 dash 3,2~b SWA.1+2 T! DPD.1 wr2Source ↗
Staples

(uf+3),4

[68] 3,2 2 dash 3,2~b SWA.1+2 T! DPD.1 wr2Source ↗
Staples

ws2

[82] ws4 df+4 2 dash 3,2~b~DF DPD.2,1 T! DPD.1 wr2Source ↗
Staples

ws2

[79] 3,2 2 dash 3,2~b~DF DPD.2,1 T! DPD.1 wr2Source ↗
Staples

ws2

[79] 3 df+4 2 dash 3,2~b~DF DPD.2,1 T! DPD.1 wr2Source ↗
Staples

ws2

[76] ws4 df+4 2 dash 3,2~b SWA.1+2 T! DPD.1 wr2Source ↗
Staples

ws2

[73] 3,2 2 dash 3,2~b SWA.1+2 T! DPD.1 wr2Source ↗
Staples

f,F+3

[72] 2 df+4 2 dash 3,2~b~DF DPD.2,1 T! DPD.1 wr2Source ↗
Staples

f,F+3

[66] 2 df+4 2 dash 3,2~b SWA.1+2 T! DPD.1 wr2Source ↗
Staples

f,F+3,4

[73] 3,2 dash 3,2~b SWA.1+2 T! DPD.1 wr2Source ↗
Staples

f,F+3,4

[69] dash ws4 df+4 b+1,2 T! DPD.1 wr2Source ↗
Staples

f,F+3,4

[67] 3,2 b+1,2 T! DPD.1 wr2Source ↗
Staples

(f,F+3),4

[77] ws4 df+4 2 dash 3,2~b~DF DPD.2,1 T! DPD.1 wr2Source ↗
Staples

(f,F+3),4

[76] 4 df+4 2 dash 3,2~b~DF DPD.2,1 T! DPD.1 wr2Source ↗
Staples

(f,F+3),4

[74] 3,2 2 dash 3,2~b~DF DPD.2,1 T! DPD.1 wr2Source ↗
Staples

(f,F+3),4

[71] ws4 df+4 2 dash 3,2~b SWA.1+2 T! DPD.1 wr2Source ↗
Staples

(f,F+3),4

[70] 4 df+4 2 dash 3,2~b SWA.1+2 T! DPD.1 wr2Source ↗
Staples

(f,F+3),4

[68] 3,2 2 dash 3,2~b SWA.1+2 T! DPD.1 wr2Source ↗
Staples

f,F+4

[82] ws4 df+4 2 dash 3,2~b~DF DPD.2,1 T! DPD.1 wr2

Can whiff off-axis

Source ↗
Staples

f,F+4

[74] ws3 3,2~b~DF DPD.2,1 T! DPD.1 wr2Source ↗
Staples

f,F+4

[71] ws3 3,2 b+1,2 T! DPD.1 wr2Source ↗
Staples

qcf+1

[86] qcf+1 df+4 df+1 dash 3,2~b~DF DPD.2,1 T! DPD.1 wr2

Smaller window to land than df+2

Source ↗
Staples

qcf+1

[86] qcf+1 df+4 df+1~b~DF WS1,2~b~DF DPD.2,1 T! DPD.1 wr2

Smaller window to land than df+2

Source ↗
Staples

qcf+1

[85] qcf+1 df+4 2 dash 3,2~b~DF DPD.2,1 T! DPD.1 wr2

Smaller window to land than df+2

Source ↗
Staples

qcf+1

[83] ws4 df+4 2 dash 3,2~b~DF DPD.2,1 T! DPD.1 wr2Source ↗
Staples

qcf+1

[82] 4 df+4 2 dash 3,2~b~DF DPD.2,1 T! DPD.1 wr2Source ↗
Staples

qcf+1

[80] 3,2 2 dash 3,2~b~DF DPD.2,1 T! DPD.1 wr2Source ↗
Staples

qcf+1

[80] qcf+1 df+4 df+1~b~DF WS1,2~b SWA.1+2 T! DPD.1 wr2

Smaller window to land than df+2

Source ↗
Staples

qcf+1

[79] qcf+1 df+4 2 dash 3,2~b SWA.1+2 T! DPD.1 wr2

Smaller window to land than df+2

Source ↗
Staples

qcf+1

[77] ws4 df+4 2 dash 3,2~b SWA.1+2 T! DPD.1 wr2Source ↗
Staples

qcf+1

[76] 4 df+4 2 dash 3,2~b SWA.1+2 T! DPD.1 wr2Source ↗
Staples

qcf+1

[74] 3,2 2 dash 3,2~b SWA.1+2 T! DPD.1 wr2Source ↗
Staples

SWA.1+2

[87] qcf+1 df+4 df+1 dash 3,2~b~DF DPD.2,1 T! DPD.1 wr2

Smaller window to land than df+2

Source ↗
Staples

SWA.1+2

[87] qcf+1 df+4 df+1~b~DF WS1,2~b~DF DPD.2,1 T! DPD.1 wr2Source ↗
Staples

SWA.1+2

[86] qcf+1 df+4 2 dash 3,2~b~DF DPD.2,1 T! DPD.1 wr2Source ↗
Staples

SWA.1+2

[84] dash ws4 df+4 2 dash 3,2~b~DF DPD.2,1 T! DPD.1 wr2Source ↗
Staples

SWA.1+2

[83] dash 4 df+4 2 dash 3,2~b~DF DPD.2,1 T! DPD.1 wr2Source ↗
Staples

SWA.1+2

[81] dash 3,2 2 dash 3,2~b~DF DPD.2,1 T! DPD.1 wr2Source ↗
Staples

SWA.1+2

[81] qcf+1 df+4 df+1~b~DF WS1,2~b SWA.1+2 T! DPD.1 wr2Source ↗
Staples

SWA.1+2

[80] qcf+1 df+4 2 dash 3,2~b SWA.1+2 T! DPD.1 wr2Source ↗
Staples

SWA.1+2

[78] dash ws4 df+4 2 dash 3,2~b SWA.1+2 T! DPD.1 wr2Source ↗
Staples

SWA.1+2

[77] dash 4 df+4 2 dash 3,2~b SWA.1+2 T! DPD.1 wr2Source ↗
Staples

SWA.1+2

[75] dash 3,2 2 dash 3,2~b SWA.1+2 T! DPD.1 wr2Source ↗
Staples

DPD.1

[84] qcf+1 df+4 df+1 dash 3,2~b~DF DPD.2,1 T! DPD.1 wr2

DPD.1: You may find all these combos easier with a SSR, but it is not required

Source ↗
Staples

DPD.1

[84] qcf+1 df+4 df+1~b~DF WS1,2~b~DF DPD.2,1 T! DPD.1 wr2

DPD.1: You may find all these combos easier with a SSR, but it is not required

Source ↗
Staples

DPD.1

[83] qcf+1 df+4 2 dash 3,2~b~DF DPD.2,1 T! DPD.1 wr2

DPD.1: You may find all these combos easier with a SSR, but it is not required

Source ↗
Staples

DPD.1

[78] qcf+1 df+4 df+1~b~DF WS1,2~b SWA.1+2 T! DPD.1 wr2

DPD.1: You may find all these combos easier with a SSR, but it is not required

Source ↗
Staples

DPD.1

[77] qcf+1 df+4 2 dash 3,2~b SWA.1+2 T! DPD.1 wr2

DPD.1: You may find all these combos easier with a SSR, but it is not required

Source ↗
Staples

qcf+1+2 T!

[67] dash qcf+1 df+4 df+1 dash 3,2~b~DF DPD.2,1Source ↗
Staples

qcf+1+2 T!

[67] dash qcf+1 df+4 df+1~b~DF WS1,2~b~DF DPD.2,1Source ↗
Staples

qcf+1+2 T!

[66] dash qcf+1 df+4 2 dash 3,2~b~DF DPD.2,1Source ↗
Staples

qcf+1+2 T!

[63] dash qcf+1 df+4 2 dash 1 dash d+4,2:1+2Source ↗
Staples

(f,F+2),2

[83] ws4 df+4 2 dash 3,2~b~DF DPD.2,1 T! DPD.1 wr2Source ↗
Staples

(f,F+2),2

[80] 3,2 2 dash 3,2~b~DF DPD.2,1 T! DPD.1 wr2Source ↗
Staples

(f,F+2),2

[77] ws4 df+4 2 dash 3,2~b SWA.1+2 T! DPD.1 wr2Source ↗
Staples

(f,F+2),2

[74] 3,2 2 dash 3,2~b SWA.1+2 T! DPD.1 wr2Source ↗
Staples

(H.b+2),1*

[100] qcf+1 df+4 df+1 dash 3,2~b~DF DPD.2,1 T! DPD.1 wr2Source ↗
Staples

(H.b+2),1*

[100] qcf+1 df+4 df+1~b~DF WS1,2~b~DF DPD.2,1 T! DPD.1 wr2Source ↗
Staples

(H.b+2),1*

[99] qcf+1 df+4 2 dash 3,2~b~DF DPD.2,1 T! DPD.1 wr2Source ↗
Staples

(H.b+2),1*

[97] ws4 df+4 2 dash 3,2~b~DF DPD.2,1 T! DPD.1 wr2Source ↗
Staples

(H.b+2),1*

[96] 4 df+4 2 dash 3,2~b~DF DPD.2,1 T! DPD.1 wr2Source ↗
Staples

(H.b+2),1*

[94] 3,2 2 dash 3,2~b~DF DPD.2,1 T! DPD.1 wr2Source ↗
Staples

(H.b+2),1*

[94] qcf+1 df+4 df+1~b~DF WS1,2~b SWA.1+2 T! DPD.1 wr2Source ↗
Staples

(H.b+2),1*

[93] qcf+1 df+4 2 dash 3,2~b SWA.1+2 T! DPD.1 wr2Source ↗
Staples

(H.b+2),1*

[91] ws4 df+4 2 dash 3,2~b SWA.1+2 T! DPD.1 wr2Source ↗
Staples

(H.b+2),1*

[90] 4 df+4 2 dash 3,2~b SWA.1+2 T! DPD.1 wr2Source ↗
Staples

(H.b+2),1*

[88] 3,2 2 dash 3,2~b SWA.1+2 T! DPD.1 wr2Source ↗
Staples

H.f+1+2*

[95] dash qcf+1 df+4 df+1 dash 3,2~b~DF DPD.2,1 T! DPD.1 wr2

H.f+1+2*: Can also be done with the Deep Dive transition, but non-WS4 routes require a crouch cancel (and the dash can be omitted). DPD.1 is also possible for 1 less damage over qcf+1

Source ↗
Staples

H.f+1+2*

[95] dash qcf+1 df+4 df+1~b~DF WS1,2~b~DF DPD.2,1 T! DPD.1 wr2

H.f+1+2*: Can also be done with the Deep Dive transition, but non-WS4 routes require a crouch cancel (and the dash can be omitted). DPD.1 is also possible for 1 less damage over qcf+1

Source ↗
Staples

H.f+1+2*

[94] dash qcf+1 df+4 2 dash 3,2~b~DF DPD.2,1 T! DPD.1 wr2

H.f+1+2*: Can also be done with the Deep Dive transition, but non-WS4 routes require a crouch cancel (and the dash can be omitted). DPD.1 is also possible for 1 less damage over qcf+1

Source ↗
Staples

H.f+1+2*

[92] dash ws4 df+4 2 dash 3,2~b~DF DPD.2,1 T! DPD.1 wr2

H.f+1+2*: Can also be done with the Deep Dive transition, but non-WS4 routes require a crouch cancel (and the dash can be omitted). DPD.1 is also possible for 1 less damage over qcf+1

Source ↗
Staples

H.f+1+2*

[91] dash 4 df+4 2 dash 3,2~b~DF DPD.2,1 T! DPD.1 wr2

H.f+1+2*: Can also be done with the Deep Dive transition, but non-WS4 routes require a crouch cancel (and the dash can be omitted). DPD.1 is also possible for 1 less damage over qcf+1

Source ↗
Staples

H.f+1+2*

[89] dash 3,2 2 dash 3,2~b~DF DPD.2,1 T! DPD.1 wr2

H.f+1+2*: Can also be done with the Deep Dive transition, but non-WS4 routes require a crouch cancel (and the dash can be omitted). DPD.1 is also possible for 1 less damage over qcf+1

Source ↗
Staples

H.f+1+2*

[89] dash qcf+1 df+4 df+1~b~DF WS1,2~b SWA.1+2 T! DPD.1 wr2

H.f+1+2*: Can also be done with the Deep Dive transition, but non-WS4 routes require a crouch cancel (and the dash can be omitted). DPD.1 is also possible for 1 less damage over qcf+1

Source ↗
Staples

H.f+1+2*

[88] dash qcf+1 df+4 2 dash 3,2~b SWA.1+2 T! DPD.1 wr2

H.f+1+2*: Can also be done with the Deep Dive transition, but non-WS4 routes require a crouch cancel (and the dash can be omitted). DPD.1 is also possible for 1 less damage over qcf+1

Source ↗
Staples

H.f+1+2*

[86] dash ws4 df+4 2 dash 3,2~b SWA.1+2 T! DPD.1 wr2

H.f+1+2*: Can also be done with the Deep Dive transition, but non-WS4 routes require a crouch cancel (and the dash can be omitted). DPD.1 is also possible for 1 less damage over qcf+1

Source ↗
Staples

H.f+1+2*

[85] dash 4 df+4 2 dash 3,2~b SWA.1+2 T! DPD.1 wr2

H.f+1+2*: Can also be done with the Deep Dive transition, but non-WS4 routes require a crouch cancel (and the dash can be omitted). DPD.1 is also possible for 1 less damage over qcf+1

Source ↗
Staples

H.f+1+2*

[83] dash 3,2 2 dash 3,2~b SWA.1+2 T! DPD.1 wr2

H.f+1+2*: Can also be done with the Deep Dive transition, but non-WS4 routes require a crouch cancel (and the dash can be omitted). DPD.1 is also possible for 1 less damage over qcf+1

Source ↗
Staples

Low Parry T!

[47] qcf+1 df+4 df+1 dash 3,2~b~DF DPD.2,1Source ↗
Staples

Low Parry T!

[47] qcf+1 df+4 df+1~b~df WS1,2~b~df DPD.2,1Source ↗
Staples

Low Parry T!

[46] qcf+1 df+4 2 dash 3,2~b~df DPD.2,1Source ↗
Staples

Low Parry T!

[43] qcf+1 df+4 2 dash 1 dash d+4,2:1+2Source ↗
Counterhit

CH SWA.4

[85] qcf+1 df+4 df+1 dash 3,2~b~DF DPD.2,1 T! DPD.1 wr2Source ↗
Counterhit

CH SWA.4

[85] qcf+1 df+4 df+1~b~DF WS1,2~b~DF DPD.2,1 T! DPD.1 wr2Source ↗
Counterhit

CH SWA.4

[84] qcf+1 df+4 2 dash 3,2~b~DF DPD.2,1 T! DPD.1 wr2Source ↗
Counterhit

CH SWA.4

[79] qcf+1 df+4 df+1~b~DF WS1,2~b SWA.1+2 T! DPD.1 wr2Source ↗
Counterhit

CH SWA.4

[78] qcf+1 df+4 2 dash 3,2~b SWA.1+2 T! DPD.1 wr2Source ↗
Counterhit

CH db+2

[87] ws4 df+4 2 dash 3,2~b~DF DPD.2,1 T! DPD.1 wr2Source ↗
Counterhit

CH db+2

[86] 4 df+4 2 dash 3,2~b~DF DPD.2,1 T! DPD.1 wr2Source ↗
Counterhit

CH db+2

[84] 3,2 2 dash 3,2~b~DF DPD.2,1 T! DPD.1 wr2Source ↗
Counterhit

CH db+2

[81] ws4 df+4 2 dash 3,2~b SWA.1+2 T! DPD.1 wr2Source ↗
Counterhit

CH db+2

[80] 4 df+4 2 dash 3,2~b SWA.1+2 T! DPD.1 wr2Source ↗
Counterhit

CH db+2

[78] 3,2 2 dash 3,2~b SWA.1+2 T! DPD.1 wr2Source ↗
Counterhit

CH SWA.3

[70] ws3 3,2~b~DF DPD.2,1 T! DPD.1 wr2Source ↗
Counterhit

CH SWA.3

[67] ws3 3,2 b+1,2 T! DPD.1 wr2Source ↗
Counterhit

CH SWA.3,2,1 T!

[72] SSL qcf+1 df+4 dash d+4,2:1+2

Allow the crouch dash to travel a bit

Source ↗
Counterhit

CH SWA.3,2,1 T!

[71] SSL qcf+1 dash 3,2~b~DF DPD.2,1

Allow the crouch dash to travel a bit

Source ↗
Counterhit

CH SWA.3,2,1 T!

[67] SSL qcf+1 dash d+4,2:1+2

Allow the crouch dash to travel a bit

Source ↗
Counterhit

CH qcf+3+4 T!

[73] qcf+1 df+4 df+1 dash 3,2~b~DF DPD.2,1Source ↗
Counterhit

CH qcf+3+4 T!

[73] qcf+1 df+4 df+1~b~DF WS1,2~b~DF DPD.2,1Source ↗
Counterhit

CH qcf+3+4 T!

[72] qcf+1 df+4 2 dash 3,2~b~DF DPD.2,1Source ↗
Counterhit

CH qcf+3+4 T!

[69] qcf+1 df+4 2 dash 1 dash d+4,2:1+2Source ↗
Counterhit

CH SWA.1

[93] qcf+1 df+4 df+1 dash 3,2~b~DF DPD.2,1 T! DPD.1 wr2Source ↗
Counterhit

CH SWA.1

[93] qcf+1 df+4 df+1~b~DF WS1,2~b~DF DPD.2,1 T! DPD.1 wr2Source ↗
Counterhit

CH SWA.1

[92] qcf+1 df+4 2 dash 3,2~b~DF DPD.2,1 T! DPD.1 wr2Source ↗
Counterhit

CH SWA.1

[90] ws4 df+4 2 dash 3,2~b~DF DPD.2,1 T! DPD.1 wr2Source ↗
Counterhit

CH SWA.1

[89] 4 df+4 2 dash 3,2~b~DF DPD.2,1 T! DPD.1 wr2Source ↗
Counterhit

CH SWA.1

[87] 3,2 2 dash 3,2~b~DF DPD.2,1 T! DPD.1 wr2Source ↗
Counterhit

CH SWA.1

[87] qcf+1 df+4 df+1~b~DF WS1,2~b SWA.1+2 T! DPD.1 wr2Source ↗
Counterhit

CH SWA.1

[86] qcf+1 df+4 2 dash 3,2~b SWA.1+2 T! DPD.1 wr2Source ↗
Counterhit

CH SWA.1

[84] ws4 df+4 2 dash 3,2~b SWA.1+2 T! DPD.1 wr2Source ↗
Counterhit

CH SWA.1

[83] 4 df+4 2 dash 3,2~b SWA.1+2 T! DPD.1 wr2Source ↗
Counterhit

CH SWA.1

[81] 3,2 2 dash 3,2~b SWA.1+2 T! DPD.1 wr2Source ↗
Counterhit

CH f+1+2*

[96] dash qcf+1 df+4 df+1 dash 3,2~b~DF DPD.2,1 T! DPD.1 wr2

CH f+1+2*: Can also be done with the Deep Dive transition, but non-WS4 routes require a crouch cancel (and the dash can be omitted). DPD.1 is also possible for 1 less damage over qcf+1

Source ↗
Counterhit

CH f+1+2*

[96] dash qcf+1 df+4 df+1~b~DF WS1,2~b~DF DPD.2,1 T! DPD.1 wr2

CH f+1+2*: Can also be done with the Deep Dive transition, but non-WS4 routes require a crouch cancel (and the dash can be omitted). DPD.1 is also possible for 1 less damage over qcf+1

Source ↗
Counterhit

CH f+1+2*

[95] dash qcf+1 df+4 2 dash 3,2~b~DF DPD.2,1 T! DPD.1 wr2

CH f+1+2*: Can also be done with the Deep Dive transition, but non-WS4 routes require a crouch cancel (and the dash can be omitted). DPD.1 is also possible for 1 less damage over qcf+1

Source ↗
Counterhit

CH f+1+2*

[93] dash ws4 df+4 2 dash 3,2~b~DF DPD.2,1 T! DPD.1 wr2

CH f+1+2*: Can also be done with the Deep Dive transition, but non-WS4 routes require a crouch cancel (and the dash can be omitted). DPD.1 is also possible for 1 less damage over qcf+1

Source ↗
Counterhit

CH f+1+2*

[92] dash 4 df+4 2 dash 3,2~b~DF DPD.2,1 T! DPD.1 wr2

CH f+1+2*: Can also be done with the Deep Dive transition, but non-WS4 routes require a crouch cancel (and the dash can be omitted). DPD.1 is also possible for 1 less damage over qcf+1

Source ↗
Counterhit

CH f+1+2*

[90] dash 3,2 2 dash 3,2~b~DF DPD.2,1 T! DPD.1 wr2

CH f+1+2*: Can also be done with the Deep Dive transition, but non-WS4 routes require a crouch cancel (and the dash can be omitted). DPD.1 is also possible for 1 less damage over qcf+1

Source ↗
Counterhit

CH f+1+2*

[90] dash qcf+1 df+4 df+1~b~DF WS1,2~b SWA.1+2 T! DPD.1 wr2

CH f+1+2*: Can also be done with the Deep Dive transition, but non-WS4 routes require a crouch cancel (and the dash can be omitted). DPD.1 is also possible for 1 less damage over qcf+1

Source ↗
Counterhit

CH f+1+2*

[89] dash qcf+1 df+4 2 dash 3,2~b SWA.1+2 T! DPD.1 wr2

CH f+1+2*: Can also be done with the Deep Dive transition, but non-WS4 routes require a crouch cancel (and the dash can be omitted). DPD.1 is also possible for 1 less damage over qcf+1

Source ↗
Counterhit

CH f+1+2*

[87] dash ws4 df+4 2 dash 3,2~b SWA.1+2 T! DPD.1 wr2

CH f+1+2*: Can also be done with the Deep Dive transition, but non-WS4 routes require a crouch cancel (and the dash can be omitted). DPD.1 is also possible for 1 less damage over qcf+1

Source ↗
Counterhit

CH f+1+2*

[86] dash 4 df+4 2 dash 3,2~b SWA.1+2 T! DPD.1 wr2

CH f+1+2*: Can also be done with the Deep Dive transition, but non-WS4 routes require a crouch cancel (and the dash can be omitted). DPD.1 is also possible for 1 less damage over qcf+1

Source ↗
Counterhit

CH f+1+2*

[84] dash 3,2 2 dash 3,2~b SWA.1+2 T! DPD.1 wr2

CH f+1+2*: Can also be done with the Deep Dive transition, but non-WS4 routes require a crouch cancel (and the dash can be omitted). DPD.1 is also possible for 1 less damage over qcf+1

Source ↗
Counterhit

CH (ws3),2

[90] SSL qcf+1 df+4 df+1~b~DF WS1,2~b~DF DPD.2,1 T! DPD.1 wr2

Whiffs on smaller characters

Source ↗
Counterhit

CH (ws3),2

[89] SSL qcf+1 df+4 2 dash 3,2~b~DF DPD.2,1 T! DPD.1 wr2

Whiffs on smaller characters

Source ↗
Counterhit

CH (ws3),2

[87] SSL ws4 df+4 2 dash 3,2~b~DF DPD.2,1 T! DPD.1 wr2Source ↗
Counterhit

CH (ws3),2

[84] SSL 3,2 2 dash 3,2~b~DF DPD.2,1 T! DPD.1 wr2

Must be done with 3+4

Source ↗
Counterhit

CH (ws3),2

[84] SSL qcf+1 df+4 df+1~b~DF WS1,2~b SWA.1+2 T! DPD.1 wr2Source ↗
Counterhit

CH (ws3),2

[83] SSL qcf+1 df+4 2 dash 3,2~b SWA.1+2 T! DPD.1 wr2Source ↗
Counterhit

CH (ws3),2

[81] SSL ws4 df+4 2 dash 3,2~b SWA.1+2 T! DPD.1 wr2Source ↗
Counterhit

CH (ws3),2

[80] SSL 4 df+4 2 dash 3,2~b SWA.1+2 T! DPD.1 wr2Source ↗
Counterhit

CH (ws3),2

[78] SSL 3,2 2 dash 3,2~b SWA.1+2 T! DPD.1 wr2

Must be done with 3+4

Source ↗
Counterhit

CH (df+3),4

[76] qcf+1 df+4 3,2~b SWA.1+2 T! DPD.1 qcf+2Source ↗
Counterhit

CH (df+3),4

[75] qcf+1 df+4 3,2~b SWA.1+2 T! dash d+4,2:1+2Source ↗
Counterhit

CH (df+3),4

[71] qcf+1 3,2~b SWA.1+2 T! DPD.1 qcf+2Source ↗
Counterhit

CH (df+3),4

[70] qcf+1 3,2~b SWA.1+2 T! dash d+4,2:1+2Source ↗
Counterhit

CH (df+3),4

[68] df+4 3,2~b SWA.1+2 T! DPD.1 qcf+2Source ↗
Counterhit

CH (df+3),4

[67] df+4 3,2~b SWA.1+2 T! dash d+4,2:1+2Source ↗
Counterhit

CH (3),2

[85] dash qcf+1 df+4 df+1 dash 3,2~b~DF DPD.2,1 T! DPD.1 wr2

CH (3),2: If you input the backsway transition, you must crouch cancel it immediately to still be able to do the combos

Source ↗
Counterhit

CH (3),2

[84] dash qcf+1 df+4 2 dash 3,2~b~DF DPD.2,1 T! DPD.1 wr2

CH (3),2: If you input the backsway transition, you must crouch cancel it immediately to still be able to do the combos

Source ↗
Counterhit

CH (3),2

[82] dash ws4 df+4 2 dash 3,2~b~DF DPD.2,1 T! DPD.1 wr2

CH (3),2: If you input the backsway transition, you must crouch cancel it immediately to still be able to do the combos

Source ↗
Counterhit

CH (3),2

[79] dash 3,2 2 dash 3,2~b~DF DPD.2,1 T! DPD.1 wr2

CH (3),2: If you input the backsway transition, you must crouch cancel it immediately to still be able to do the combos

Source ↗
Counterhit

CH (3),2

[78] dash qcf+1 df+4 2 dash 3,2~b SWA.1+2 T! DPD.1 wr2

CH (3),2: If you input the backsway transition, you must crouch cancel it immediately to still be able to do the combos

Source ↗
Counterhit

CH (3),2

[76] f,F+4 ws4 df+4 b+1,2 T! DPD.1 wr2

CH (3),2: If you input the backsway transition, you must crouch cancel it immediately to still be able to do the combos

Source ↗
Counterhit

CH (3),2

[76] dash ws4 df+4 2 dash 3,2~b SWA.1+2 T! ! DPD.1 wr2

CH (3),2: If you input the backsway transition, you must crouch cancel it immediately to still be able to do the combos

Source ↗
Counterhit

CH (3),2

[73] dash 3,2 2 dash 3,2~b SWA.1+2 T! DPD.1 wr2

CH (3),2: If you input the backsway transition, you must crouch cancel it immediately to still be able to do the combos

Source ↗
Counterhit

CH (DPD.2),3 / CH (SWA.3,2),3

[91] qcf+1 df+4 df+1 dash 3,2~b~DF DPD.2,1 T! DPD.1 wr2

Smaller window to land than df+2

Source ↗
Counterhit

CH (DPD.2),3 / CH (SWA.3,2),3

[91] qcf+1 df+4 df+1~b~DF WS1,2~b~DF DPD.2,1 T! DPD.1 wr2

Smaller window to land than df+2

Source ↗
Counterhit

CH (DPD.2),3 / CH (SWA.3,2),3

[90] qcf+1 df+4 2 dash 3,2~b~DF DPD.2,1 T! DPD.1 wr2

Smaller window to land than df+2

Source ↗
Counterhit

CH (DPD.2),3 / CH (SWA.3,2),3

[88] ws4 df+4 2 dash 3,2~b~DF DPD.2,1 T! DPD.1 wr2Source ↗
Counterhit

CH (DPD.2),3 / CH (SWA.3,2),3

[87] 4 df+4 2 dash 3,2~b~DF DPD.2,1 T! DPD.1 wr2Source ↗
Counterhit

CH (DPD.2),3 / CH (SWA.3,2),3

[85] 3,2 2 dash 3,2~b~DF DPD.2,1 T! DPD.1 wr2Source ↗
Counterhit

CH (DPD.2),3 / CH (SWA.3,2),3

[85] qcf+1 df+4 df+1~b~DF WS1,2~b SWA.1+2 T! DPD.1 wr2

Smaller window to land than df+2

Source ↗
Counterhit

CH (DPD.2),3 / CH (SWA.3,2),3

[84] qcf+1 df+4 2 dash 3,2~b SWA.1+2 T! DPD.1 wr2

Smaller window to land than df+2

Source ↗
Counterhit

CH (DPD.2),3 / CH (SWA.3,2),3

[82] ws4 df+4 2 dash 3,2~b SWA.1+2 T! DPD.1 wr2Source ↗
Counterhit

CH (DPD.2),3 / CH (SWA.3,2),3

[81] 4 df+4 2 dash 3,2~b SWA.1+2 T! DPD.1 wr2Source ↗
Counterhit

CH (DPD.2),3 / CH (SWA.3,2),3

[79] 3,2 2 dash 3,2~b SWA.1+2 T! DPD.1 wr2Source ↗
Float

1

[54] qcf+1 df+4 3,2~b SWA.1+2 T! 2 wr2Source ↗
Float

2+3

[51] SSR qcf+1 (x3) dash 3,2~b SWA.1+2 T! SSR 2 wr2Source ↗
Float

2+3

[50] SSR qcf+1 (x2) df+4 3,2~b SWA.1+2 T! 2 wr2Source ↗
Float

2+3

[48] qcf+1 df+4 ws3 3,2~b SWA.1+2 T! 2 wr2Source ↗
Float

2+3

[46] qcf+1 df+4 2 dash 3,2~b SWA.1+2 T! 2 wr2Source ↗
Float

SWA.1+2 T!

[50] SSR qcf+1 df+4 2 wr2Source ↗
Float

ws4

[59] dash 3,2 dash 3,2~b SWA.1+2 T! 2 wr2Source ↗
Float

ws4

[58] df+4 2 dash 3,2~b SWA.1+2 T! 2 wr2Source ↗
Heat Burst

[102] SWA.1+2 / [101] qcf+1 / [100] CH SWA.4 / [99] DPD.1 / [93] df+2

qcf+1 df+4 df+1~b~DF WS1,2~b~DF DPD.2,1 T! DPD.1 2+3 H.qcf+2~F qcf+2Source ↗
Heat Burst

[98] ff+(2),2 / [97] ws2 / [97] f,F+4 / [93] b+3 SSL

ws4 df+4 2 dash 3,2~b~DF DPD.2,1 T! DPD.1 2+3 H.qcf+2~F qcf+2Source ↗
Heat Burst

qcf+1+2 T!

[84] SSR qcf+1 df+4 3,2~b~u 2+3 qcf+1 H.qcf+2 qcf+2Source ↗
Heat Burst

qcf+1+2 T!

[79] SSR qcf+1 df+4 1,2 2+3 qcf+1 H.qcf+2 qcf+2Source ↗
Heat Burst

CH qcf+3+4 T!

[90] dash qcf+1 df+4 3,2~b~u 2+3 qcf+1 H.qcf+2 qcf+2

CH qcf+3+4 T!: May require SSR

Source ↗
Heat Burst

CH qcf+3+4 T!

[85] dash qcf+1 df+4 1,2 2+3 qcf+1 H.qcf+2 qcf+2

CH qcf+3+4 T!: May require SSR

Source ↗
Heat Burst

Low Parry

[64] qcf+1 df+4 3,2~b~u 2+3 qcf+1 H.qcf+2 qcf+2Source ↗
Heat Burst

Low Parry

[59] qcf+1 df+4 1,2 2+3 qcf+1 H.qcf+2 qcf+2Source ↗
Heat dash

[80] H.qcf+2~F / [72] H.u+2~F

qcf+1 qcf+1 qcf+1 1 dash 3,2~b~DF DPD.2,1 T! DPD.1 wr2

[80] H.qcf+2~F: Needs SSR alignment / Impractical / Fahkumram only

Source ↗
Heat dash

[79] H.qcf+2~F / [71] H.u+2~F

qcf+1 qcf+1 qcf+1 dash 3,2~b~DF DPD.2,1 T! DPD.1 wr2

[79] H.qcf+2~F: May need SSR alignment / Impractical

Source ↗
Heat dash

[78] H.qcf+2~F / [70] H.u+2~F / [65] H.qcb+2~F

qcf+1 ws4 df+4 1 dash 3,2~b~DF DPD.2,1 T! DPD.1 wr2

Impractical on small characters

Source ↗
Heat dash

[77] H.qcf+2~F / [69] H.u+2~F / [64] H.qcb+2~F

qcf+1 ws4 df+4 3,2~b~DF DPD.2,1 T! DPD.1 wr2Source ↗
Heat dash

[74] H.qcf+2~F / [66] H.u+2~F / [61] H.qcb+2~F

qcf+1 df+4 df+1~b~DF ws1,2~b~DF DPD.2,1 T! DPD.1 wr2Source ↗
Heat dash

[52] H.f+4~F / [40] H.f+2~F

qcf+2

Must be buffered early when near the wall

Source ↗
Heat dash

CH ws(1),2~b H.SWA.2~F

[61] qcf+1 ws4 df+4 3,2~b~DF DPD.2,1 T! DPD.1 wr2Source ↗
Guard Break

Midscreen / H.b+2,1* / H.d+1,2*

[35] b+1,2Source ↗
Guard Break

Midscreen / H.b+2,1* / H.d+1,2*

[34] d+1+2Source ↗
Guard Break

Wall Reset

W! H.b+2,1* d+1+2 W! Resplat

Assumes H.b+2 knockdown followed by blocked 1. Can be countered by backrise i11 or evaded with backrise sidewalk

Source ↗
Guard Break

Wall Reset

W! H.b+2,1* qcb+3,2,1 W! H.b+2,1*

Assumes H.b+2 knockdown followed by blocked 1. Can be countered by backrise i11 or evaded with backrise sidewalk

Source ↗
Back-turned opponent

df+2

[68] qcf+1 df+4 3,2~b SWA.1+2 T! dash SSR d+4,2:1+2Source ↗
Back-turned opponent

df+2

[60] df+4 3,2~b SWA.1+2 T! d+4,2:1+2Source ↗
Back-turned opponent

df+2

[55] 3,2~b SWA.1+2 T! d+4,2:1+2Source ↗
Back-turned opponent

3,2~b SWA.1+2

[108 (31+77)] qcf+1 df+4 3,2~b SWA.1+2 T! d+4,2:1+2

3,2~b SWA.1+2: Guaranteed on most characters

Source ↗
Back-turned opponent

3,2~b SWA.1+2

[103 (31+72)] qcf+1 3,2~b SWA.1+2 T! d+4,2:1+2

3,2~b SWA.1+2: Guaranteed on most characters

Source ↗
Back-turned opponent

3,2~b SWA.1+2

[103 (31+72)] qcf+3+4 T! qcf+1 (x2) dash d+4,2:1+2

3,2~b SWA.1+2: Guaranteed on most characters

Source ↗
Back-turned opponent

ws1,2~b SWA.1+2

[114 (15+20+79)] qcf+1 df+4 3,2~b SWA.1+2 T! dash SSR d+4,2:1+2

ws1,2~b SWA.1+2: Guaranteed on most characters / Use when tech rolling into an opponent's back

Source ↗
Back-turned opponent

ws1,2~b SWA.1+2

[114 (15+20+79)] qcf+1 df+4 qcb+3,2,1 T! dash SSR d+4,2:1+2

ws1,2~b SWA.1+2: Guaranteed on most characters / Use when tech rolling into an opponent's back

Source ↗
Back-turned opponent

ws1,2~b SWA.1+2

[104 (15+20+79)] df+4 3,2~b SWA.1+2 T! dash SSR d+4,2:1+2

ws1,2~b SWA.1+2: Guaranteed on most characters / Use when tech rolling into an opponent's back

Source ↗
Midnight Siege

H.qcf+2 WBl! / d+4,2:1+2 WBl!

[115] SSR qcf+1 (x2) W! qcf+3+4 d+1+2 1 H.qcf+2Source ↗
Midnight Siege

H.qcf+2 WBl! / d+4,2:1+2 WBl!

[111] SSL d+4,2:1+2 w! db+2 1 H.qcf+2Source ↗
Midnight Siege

H.qcf+2 WBl! / d+4,2:1+2 WBl!

[109] SSR qcf+1 SWA.3,2,1 W! 1 H.qcf+2Source ↗
Midnight Siege

H.qcf+2 WBl! / d+4,2:1+2 WBl!

[109] qcf+1 b+1,2 W! 3,2~b H.qcf+2Source ↗
Midnight Siege

H.qcf+2 WBl! / d+4,2:1+2 WBl!

[105] qcf+1 SWA.3,2,1 W! 3,2~b d+1+2Source ↗
Midnight Siege

H.qcf+2 WBl! / d+4,2:1+2 WBl!

[102] d+4,2:1+2 W! 3,2~b d+1+2Source ↗
Extras

df2/uf4

[84] qcf+1 (x3) dash 3,2~b~DF DPD.2,1 T! DPD.1 wr2

Does not work on smaller characters / Every qcf+1 after the first is frame perfect / Requires an extreme SSR angle to avoid realignment from occurring

Source ↗
Extras

b+3

[79] ws4 df+4 df+1 dash 3,2~b~DF DPD.2,1 T! DPD.1 wr2Source ↗
Extras

uf+3

[78] ws4 df+4 df+1 dash 3,2~b~DF DPD.2,1 T! DPD.1 wr2Source ↗
Extras

ws2

[84] 3,2~b~u qcf+1 microdash 3,2~b~DF DPD.2,1 T! DPD.1 wr2

works on Fahkumram, Kuma and Panda only

Source ↗
Extras

ws2

[83] ws4 df+4 df+1 dash 3,2~b~DF DPD.2,1 T! DPD.1 wr2Source ↗
Extras

f,F+3

[79] ws4 df+4 2 dash 3,2~b~DF DPD.2,1 T! DPD.1 wr2

Requires a near perfect CD4 input (done as d,f,f+4 with 1 frame to spare or a perfectly timed d,df,f,f+4)

Source ↗
Extras

qcf+1

[92] qcf+1 (x3) dash 3,2~b~DF DPD.2,1 T! DPD.1 wr2

Does not work on smaller characters / Every qcf+1 after the first is frame perfect

Source ↗
Extras

CH f+1+2*

[102] dash qcf+1 (x3) dash 3,2~b~DF DPD.2,1 T! DPD.1 wr2

Does not work on smaller characters / Every qcf+1 after the first is frame perfect

Source ↗
Extras

CH f+1+2*

[98] dash qcf+1 df+4 ws3 3,2~b~DF DPD.2,1 T! DPD.1 wr2

Does not work on smaller characters

Source ↗
Extras

CH f+1+2*

[76] ~DF WS1,2~b SWA.1+2 T! DPD.1 dash qcf+2

Side switches

Source ↗
Extras

H.f+1+2*

[101] dash qcf+1 (x3) dash 3,2~b~DF DPD.2,1 T! DPD.1 wr2

Does not work on smaller characters / Every qcf+1 after the first is frame perfect

Source ↗
Extras

H.f+1+2*

[97] dash qcf+1 df+4 ws3 3,2~b~DF DPD.2,1 T! DPD.1 wr2

Does not work on smaller characters

Source ↗
Extras

H.f+1+2*

[75] ~DF WS1,2~b SWA.1+2 T! DPD.1 dash qcf+2

Side switches

Source ↗
Extras

CH SWA.1

[99] SSR qcf+1 (x3) dash 3,2~b~DF DPD.2,1 T! DPD.1 wr2

Does not work on smaller characters / Every qcf+1 after the first is frame perfect

Source ↗
Extras

CH SWA.1

[95] dash qcf+1 df+4 ws3 3,2~b~DF DPD.2,1 T! DPD.1 wr2Source ↗
Extras

CH SWA.4

[91] dash qcf+1 (x3) dash 3,2~b~DF DPD.2,1 T! DPD.1 wr2

Does not work on smaller characters / Every qcf+1 after the first is frame perfect

Source ↗
Extras

CH SWA.4

[87] SSL qcf+1 df+4 ws3 3,2~b~DF DPD.2,1 T! DPD.1 wr2Source ↗
Extras

DPD.1

[90] SSR qcf+1 (x3) dash 3,2~b~DF DPD.2,1 T! DPD.1 wr2

Does not work on smaller characters / Every qcf+1 after the first is frame perfect

Source ↗
Extras

DPD.1

[86] SSR qcf+1 df+4 ws3 3,2~b~DF DPD.2,1 T! DPD.1 wr2

Does not work on smaller characters

Source ↗
Extras

Low Parry

[53] SSR qcf+1 (x3) dash 3,2~b~DF DPD.2,1Source ↗
Extras

Low Parry

[51] SSR qcf+1 (x2) df+4 dash 3,2~b~DF DPD.2,1Source ↗
Extras

Low Parry

[49] qcf+1 df+4 ws3 3,2~b~DF DPD.2,1Source ↗
Extras

CH H.qcf+2 W!

[138] backdash qcf+1 W! qcf+3+4 d+1+2 3,2~b~u H.qcf+2

Max damage without stage gimmicks?

Source ↗
Extras

CH qcf+3 (Kuma/Panda/Raven only)

[75] db+2 T! DPD.1 qcf+1 df+4 dash d+4,2:1+2Source ↗
Extras

CH qcf+3 (Kuma/Panda/Raven only)

[71] db+2 T! qcf+1 (x2) dash d+4,2:1+2Source ↗
Extras

CH SWA.3,2,1 T!

[73] SSL qcf+1 (x2) dash Demoman

Every qcf+1 after the first is frame perfect

Source ↗
Extras

CH ws(3),2 / CH df+(3),4

SSR qcf+3+4 T! df+4 df+4 df+4 2+3...

Side switches

Source ↗
Extras

Extremely difficult and rarely useful

[73] qcf+1 (x2) 3,2~b~u wr2Source ↗

You blocked. Cash in.

Punishment

After their unsafe move, within reach.

From standing

−10
1,2

17 damage · +8 on hit

−10
2,3

22 damage · +8 on hit

−10
1,2,3

24 damage · -14 on hit

−12
b+1,2

31 damage · +16d (-1) FDFA on hit

−12
d+1+2

28 damage · +16d (+11) on hit

−13
f+2

34 damage · +9 on hit

−14
b+3

16 ( 78 ) damage · +31a (+25) on hit

−15
df+2

13 ( 78 ) damage · +33a (+23) on hit

−15
uf+3

15 ( 78 ) damage · +25a (+15) on hit

−15
uf+4

13 ( 78 ) damage · +33a (+23) on hit

−15
CS.2 [hard]

45 damage · +26a (-10) FDFA on hit

Long range only

−16
f+3,1

32 damage · +12a (+3) on hit

Long range only

−18
SWA.1+2 [hard]

22 ( 87 ) damage · +37a (+27) on hit

From crouch / while standing

−10
db+1

5 damage · +6 on hit

−11
ws4

18 damage · +5 on hit

−13
ws3,2

37 damage · +17d (+8) on hit

−14
f,F+2:1

38 damage · +37d (+11) on hit

Done as FC.df+2:1

−15
ws2

20 ( 82 ) damage · +27a (+17) on hit

−18
SWA.1+2 [hard]

22 ( 87 ) damage · +37a (+27) on hit

Must be crouch cancelled first

Whiff punishment

MISS
b+3

16 ( 78 ) damage · i14~15 startup

Risk: -6 · Hitbox: High

MISS
df+2

13 ( 78 ) damage · i15~16 startup

Risk: -8 · Hitbox: Mid Cannot launch moves that end in crouching status

MISS
1,2

17 damage · i10 startup

Risk: -3 · Hitbox: High

MISS
2,3

22 damage · i10 startup

Risk: -2 · Hitbox: High

MISS
b+1,2

31 damage · i12~13 startup

Risk: -14 · Hitbox: High

MISS
d+1+2

28 damage · i12~13 startup

Risk: -18 · Hitbox: Mid

MISS
f+2

34 damage · i13 startup

Risk: -5 · Hitbox: High

MISS
CS.1

21 ( 86 ) damage · i18~19 startup

Risk: -4 · Hitbox: High

MISS
3,2~b

32 damage · i15~16 startup

Risk: +4 · Hitbox: Mid

MISS
d+1

16 damage · i14~15 startup

Risk: -9 · Hitbox: Mid

MISS
SWA.2

27 damage · i17 startup

Risk: -9 · Hitbox: Mid

MISS
CS.2

45 damage · i15-16 startup

Risk: -17 · Hitbox: Mid

MISS
R.df+1+2

55 damage · i20 startup

Risk: -18 · Hitbox: Mid

MISS
f+3,1

32 damage · i16~17 startup

Risk: -13 · Hitbox: High

MISS
SWA.4

17 damage · i17~18 startup

Risk: +1 · Hitbox: High

MISS
f,F+2:1

38 damage · i16~17 startup

Risk: -1 · Hitbox: Mid Additional range with delayed forward inputs

MISS
SWA.1+2

22 ( 87 ) damage · i18~19 startup

Risk: -14 · Hitbox: Mid

MISS
f+4

24 damage · i22 startup

Risk: -5 · Hitbox: Mid

MISS
uf+2

26 damage · i22~23 startup

Risk: +5 · Hitbox: High

MISS
f,f,F+2

48 damage · i21~22 startup

Risk: -9 · Hitbox: Mid Additional range with delayed forward inputs

−12 means the opponent is at least 12 frames unsafe. Stance, Heat, range and special-state requirements still apply. “ws” means while rising from crouch, not while walking forward.

Don't hand them a free turn

Know the risk

Moves listed at −10 or worse on block. Strings may also be duckable or interruptible even when their final block value is safe. Read the conditions.

Unsafe-on-block reference 52 entries
MoveOn blockLevelConditions / notes
1+2
Half-Step Phoenix Smasher
-10mBalcony Break H.1+2 with Heat Move can be delayed 11f (i39) Charge begins on frame 1 Requires 1~27f charge Delayed startup from 17~27f charge Cancel to t27 r1 CS from 17~35f with f Cancel can be delayed 8f Sidestep u can be buffered 2f after cancel CS attacks can be buffered from 26f Decaying 13f delay on CS attacks Decays to 0 delay 24f after cancel Cancel to t41 r12 SWA from 17~35f with b Cancel can be delayed 8f Sidestep u can be buffered from 27f SWA attacks can be buffered from 26f 1+2* from 28~55f charge Burning Fist at 56f charge
DPD.df+2
-10mBalcony Break Effective minimum startup 24f Sometimes written DPD.2 DD.2
SWA.3,2
-10L ,mCombo from 1st CH +20d (+13) Sometimes written qcb+3,2
df+3,4
Phoenix Wings
-10m ,mMove can be delayed 10f Input can be delayed 13f Combo from 1st hit with 9f delay Interrupt with i4 from 1st block Whiffs vs SSR from 1st block
ws1
-10mVerify reach, stance and final-hit situation in Practice.
1,4
Reverse PDK Combo
-11ch ,LCombo from 1st CH Interrupt with i4 from 1st block
db+2
Shoot the Moon
-11MTornado Balcony Break
ws1,2
Enfolding Dragon
-11m ,mMove can be delayed 10f Input can be delayed 10f Combo from 1st CH with 10f delay Transition to t59 r19 SWA +1 +14g +15 from 39~44f with b
CS.1+2
Gunba
-12cLCancel to t41 FC with B Sometimes written qcf+1+2
OTG.d+2
Down Strike
-12cLSpike +4 on hit against standing opponent
SS.3
Pump In Pedal
-12cLEffective minimum startup 28f
b+2,1
Crushing Wind
-12m ,mMove can be delayed 20f (i56) Charge begins on frame 18 Requires 0~41f charge Delayed startup from 22~41f charge Combo from 1st CH with 0~23f charge b+2,1* / H.b+2,1* at 42f charge
b+4
Leg Sweep
-12cLVerify reach, stance and final-hit situation in Practice.
f,F+2,1
Juggernaut
-12m ,mBalcony Break Combo from 1st hit Interrupt with i8 from 1st block Whiffs vs SWR from 1st block (SSL, SSR and SWL inconsistent depending on character) Cancel to -21 -11 standing r40 with B at frame 20 Alternate input FC.df+2,1
DPD.df+2,3
Quick Lightning Breaker
-13cm ,MSpike Move can be delayed 10f Input can be delayed 17f Combo from 1st hit with 6f delay Sometimes written DPD.2,3 DD.2,3
DPD.df+4
Eigetsu
-13LEffective minimum startup 27f Clean Hit range 1 Damage without clean hit 20 Sometimes written DPD.4 DD.4
H.CS.2
Phoenix Smasher
-13mHeat Dash +5, +36a (+26) Balcony Break Reversal Break Consumes Heat Chip damage (11) Clean Hit range 2.3 Heat Dash disables Clean Hit 34 damage without Clean Hit Sometimes written H.qcf+2 Heat Deathfist
SWA.3,2,3
Lightning Breaker
-13cL,m ,MSpike Combo from 1st CH +15d (-20) FDFA Move can be delayed 10f Input can be delayed 17f Sometimes written qcb+3,2,3
d+1,H.2
Phoenix Smasher
-13m ,mBalcony Break Reversal Break Consumes Heat Move can be delayed 14f (i43) Charge begins on frame 16 Requires 0~26f charge Delayed startup from 1~26f charge Combo from 1st CH with 0~6f charge Interrupt with i10 from 1st block Whiffs vs SSR, SWR from 1st block H.d+1,2* at 27f charge Sometimes written H.d+1,2
f+3,1
Lion's Tempest
-13h ,mBalcony Break Elbow Combo from 1st hit Interrupt with i1 from 1st block Move is delayed by 5F Move cannot be delayed Input cannot be delayed
uf+3,4
Shredder
-13m ,mJail from 1st block Combo from 1st hit +28a (+21)
uf+4
Rising Toe Kick
-13mSometimes written Hopkick
uf,n,4
Delayed Rising Toe Kick
-13mCan be delayed 12f after jump Additional range with delay
CS.3
Gengetsu
-14cLClean hit range 2.0 17 damage on hit without Clean Hit +7 on CH without Clean Hit Sometimes written qcf+3
H.2+3
Demolition Ball
-14L,m,tHeat Smash Balcony Break Fully consumes Heat Chip damage (8) Transition to throw on 1st hit only 40 damage with throw transition 53 damage on 2nd + 3rd hit t134 r49 on block t124 on whiff
SWA.1+2
Unseen Gust
-14mTornado Elbow High evasion Sometimes written qcb+1+2
b+1,2
Double Wing
-14h ,mTornado Balcony Break Move can be delayed 5f Input can be delayed 5f Combo from 1st hit with 5f delay
d+1,4,2
Hang Over
-14m,L ,mBalcony Break Elbow Airborne combo from 2nd CH +11d (+4)
db+1+2
Chain Breaker
-14MShoulder -9 block advantage and 8 chip damage on block after attack absorption
f+1+4
Shoulder Tackle
-14mBalcony Break Shoulder Sharp leftward movement w/ i5? startup Forces tech back roll on hit
f+3
-14hHoming
f,F+3,4,f+4
Triple Kick Combo
-14m,m ,mBalcony Break Interrupt with i15 from 1st block Move cannot be delayed Input can be delayed by 6F
ws2
Thunder Palm
-14mVerify reach, stance and final-hit situation in Practice.
db+4
-15c
Often launch-punishable
LVerify reach, stance and final-hit situation in Practice.
f,F+3,4
-16
Often launch-punishable
m ,mAirborne combo from 1st hit with 2F delay +27a (+10) Jail from 1st block with 2F delay Move cannot be delayed Input can be delayed by 2F
uf+3
-16
Often launch-punishable
mVerify reach, stance and final-hit situation in Practice.
CS.2
Phoenix Smasher
-17
Often launch-punishable
mHeat Engager Balcony Break H.CS.2 with Heat Clean Hit range 2.3 30 damage without Clean Hit Sometimes written qcf+2 Deathfist
d+1,2
Phoenix Smasher
-17
Often launch-punishable
m ,mBalcony Break H.d+1,2 with Heat Move can be delayed 14f (i43) Charge begins on frame 16 Requires 0~26f charge Delayed startup from 1~26f charge Combo from 1st CH with 0~6f charge (i30) d+1,2* at 27f charge Interrupt with i10 from 1st block
d+4,2,1+2
Demolition Man
-17
Often launch-punishable
L,m ,mBalcony Break Move can be delayed 4f Input can be delayed 4f Combo from 1st CL with 4f delay +13d (+6) Combo from 1st CH with 4f delay +13d (+6) Combo from 2nd hit with 4f delay +13d (+6) Perfect input window 21~22f after 2 input Move cannot be interrupted Sometimes written Demoman
d+4,2:1+2
Demolition Man (Perfect Input)
-17
Often launch-punishable
L,m ,mBalcony Break Move can be delayed 1f Input can be delayed 1f Combo from 1st CL with 1f delay +13d (+6) Combo from 1st CH with 1f delay +13d (+6) Combo from 2nd hit with 1f delay +13d (+6) Perfect input window 21~22f after 2 input Perfect input increases damage, wall carry Move cannot be interrupted
f,F+2
-17
Often launch-punishable
mElbow Alternate input FC.df+2
f,F+3
-17
Often launch-punishable
mVerify reach, stance and final-hit situation in Practice.
f,F+3,4,d+4
Double Hop Kick Low
-17c
Often launch-punishable
m,m ,LInterrupt with i15 from 1st block Whiffs vs SWL from 1st block Move cannot be delayed Input can be delayed by 6F
R.df+1+2
Big Bang Phoenix Smasher
-18
Often launch-punishable
m,tRage Art Removes Recoverable Health Reversal Break Damage increases with lower health, maximum 82 Restores recoverable health on hit Transition to attack throw on hit Consumes Rage 114f cinematic freeze on frame 8 t193 r56 on block t134 on whiff
d+1+2
Shoulder Smash
-18
Often launch-punishable
mBalcony Break Shoulder Sometimes written Shoulder
d+4,2
Bone Breaker
-18
Often launch-punishable
L ,mElbow Move can be delayed 3f Input can be delayed 4f Combo from 1st CL with 3f delay +5d (-2) Combo from 1st CH with 3f delay +5d (-2)
db+3
-18c
Often launch-punishable
L-4c on crouching hit
f,F+2,2
Bulldozer
-19c
Often launch-punishable
m ,LCancel to -28 -18 FC with B Interrupt with i18 from 1st block Whiffs vs SSL, SW from 1st block Alternate input FC.df+2,2
SWA.3
Rapid Fire
-21c
Often launch-punishable
LSometimes written qcb+3
1,2,3
-25
Often launch-punishable
h,h ,mCombo from 1st hit Jail from 1st hit Cancel to 10 strings
d+1,4
-31c
Often launch-punishable
m ,LMove cannot be delayed Input can be delayed 5f Combo from 1st CH with 5f delay Interrupt with i6 from 1st block Stagger low
d+4
-31c
Often launch-punishable
LClean Hit range 1.59 8 damage, -17 on hit without Clean Hit Stagger state on block

The reference shelf

Full move list

Search Paul's moves 143 entries
Command / nameLevelStartupBlockHit / CHDamage / notes
2+3
Heat Burst
mi16
i16
+1+2c / —12

Heat Burst Consumes Heat t92 on whiff Cinematic freeze on frame 15 Cancel to t42 r26 standing with b,b

H.2+3
Demolition Ball
L,m,ti18
i18,i21,i38
-14+3d / —9,23,25

Heat Smash Balcony Break Fully consumes Heat Chip damage (8) Transition to throw on 1st hit only 40 damage with throw transition 53 damage on 2nd + 3rd hit t134 r49 on block t124 on whiff

f+2
Phoenix Hook, Tiger Claw
h,ti13
i13
-5+9 / —12,22

Heat Engager +9 Heat Dash +5, +43d (+35) Transition to throw on front hit Transition to +7 DPD r27 on hit with DF at frame 93 +32a without throw transition

SWA.2
Rubber Band Attack
mi15
i15
-9+39d (-19) / —27

Heat Engager Heat Dash +5, +36a (+26) Clean Hit range 2.45 Heat Dash disables Clean Hit 21 damage without Clean Hit Sometimes written qcb+2

f+4
Stone Lion
mi22
i22
-5+6 / —24

Heat Engager Heat Dash +43d (+35) Homing

uf+2
Moonfall
hi22
i22~23
+5+17a / —26

Heat Engager Heat Dash +5, +67a (+50) Balcony Break Chip damage (6) Transition to +2, +14a r35 DPD with DF (cs25~58)

CS.2
Phoenix Smasher
mi13
i13~14
-17+26a (-10) FDFA / —45

Heat Engager Balcony Break H.CS.2 with Heat Clean Hit range 2.3 30 damage without Clean Hit Sometimes written qcf+2 Deathfist

H.CS.2
Phoenix Smasher
mi13
i13~14
-13+26a (-10) FDFA / —51

Heat Dash +5, +36a (+26) Balcony Break Reversal Break Consumes Heat Chip damage (11) Clean Hit range 2.3 Heat Dash disables Clean Hit 34 damage without Clean Hit Sometimes written H.qcf+2 Heat Deathfist

H.1+2
Half-Step Phoenix Smasher
mi28
i28
-9+30d (-6) FDFA / —35

Balcony Break Reversal Break Consumes Heat unless canceled Chip damage (10) Move can be delayed 11f (i39) Charge begins on frame 1 Requires 1~27f charge Delayed startup from 17~27f charge Cancel to t27~35 r1 CS from 17~35f with f Sidestep u can be buffered 2f after cancel CS attacks can be buffered from 26f Decaying 13f delay on CS attacks Decays to 0 delay 24f after cancel Cancel to t41~49 r12 SWA from 17~35f with b Sidestep u can be buffered from 27f SWA attacks can be buffered from 26f H.1+2* from 28~55f charge Burning Fist at 56f charge

H.1+2*
Half-Step Phoenix Smasher (Hold)
mi46
i46
+13g+30d (-6) FDFA / —40

Balcony Break Reversal Break Consumes Heat unless canceled Chip damage (16) Move can be delayed 21f (i67) Charge begins on frame 1 Requires 28~55f charge Delayed startup from 35~55f charge Cancel to t27~35 r1 CS from 17~35f with f Sidestep u can be buffered 2f after cancel CS attacks can be buffered from 26f Decaying 13f delay on CS attacks Decays to 0 delay 24f after cancel Cancel to t41~49 r12 SWA from 17~35f with b Sidestep u can be buffered from 27f SWA attacks can be buffered from 26f H.1+2 from 1~27f charge Burning Fist at 56f charge

H.1+2**
Burning Fist
m!i71
i71
+30d (-6) FDFA / —50

Balcony Break Reversal Break Consumes Heat Charge begins on frame 1 Requires 56f charge H.1+2 from 1~27f charge H.1+2* from 28~55f charge

df+1+3,H.qcf+2
Phoenix Smasher
t ,mi12
,i13~14
+16d (-20) FDFA / —22 ,21

Balcony Break Consumes Heat Strict qcf input required (d,F does not work) Perfect input window 55-56f Sometimes written H.df+1+3,qcf+2

df+1+3:H.qcf+2
Phoenix Smasher (Perfect Input)
t ,mi12
,i13~14
+16d (-20) FDFA / —22 ,26

Balcony Break Consumes Heat Strict qcf input required (d,F does not work) Perfect input window 55-56f Perfect input increases damage, wall carry Sometimes written H.df+1+3:qcf+2

d+1,H.2
Phoenix Smasher
m ,mi14
,i29
-13+29d (-7) FDFA / —16 ,32

Balcony Break Reversal Break Consumes Heat Move can be delayed 14f (i43) Charge begins on frame 16 Requires 0~26f charge Delayed startup from 1~26f charge Combo from 1st CH with 0~6f charge Interrupt with i10 from 1st block Whiffs vs SSR, SWR from 1st block H.d+1,2* at 27f charge Sometimes written H.d+1,2

d+1,H.2*
Phoenix Smasher (Hold)
m ,mi14
,i43
+12+30d (-6) FDFA / —16 ,45

Balcony Break Guard Break Reversal Break Consumes Heat Chip damage (13) Charge begins on frame 16 Requires 27f charge Interrupt with i24 from 1st block Interrupt with i13 from 1st hit Interrupt with i9 from 1st CH Whiffs vs SS, SW from 1st block Whiffs vs SSR, SWR from 1st hit or CH H.d+1,2 from 0~26f charge Sometimes written H.d+1,2*

b+2,H.1*
Crushing Wind (Hold)
m ,mi18
,i60~61
+12+56a / —22 ,35

Balcony Break Guard Break Consumes Heat Chip damage (13) Charge begins on frame 18 Requires 42f charge Interrupt with i29 WS from 1st block Interrupt with i20 WS from 1st hit Whiffs vs SSR, SW from 1st block or hit b+2,1 from 0~41f charge Sometimes written H.b+2,1*

H.f+1+2*
Hammer of the Gods (Hold)
mi29
i29~30
+5c+55a / —30

Balcony Break Consumes Heat Chip damage (13) Requires 24f charge f+1+2 from 0~23f charge

f,F+2,H.1+2
Phoenix Demolisher
m ,mi15
i29~30
+1+25a (-1) / —14 ,31

Balcony Break Consumes 270F of Heat Combos from 1st hit Jails from 1st hit 7 chip damage

1
Left Jab
hi10
i10
+1+8 / —5

Recovers 2f faster on hit or block (t27 r17)

1,2
Left Right Combo
h ,hi10
,i10
-3+8 / —5 ,12

Move can be delayed 3f Input can be delayed 3f Combo from 1st hit with 3f delay Jail from 1st attack with 3f delay

1,2,3
h,h ,mi10
,i16~17
-25-14 / —5,12 ,7

Combo from 1st hit Jail from 1st hit Cancel to 10 strings

1,4
Reverse PDK Combo
h ,Li10
,i23
-11c+1 / —5 ,8

Combo from 1st CH Interrupt with i4 from 1st block

2
Right Jab
hi10
i10
+0+6 / —8

2,3
Goodnight
h ,hi10
i19
-2+8 / —8 ,14

Knee Combo from 1st hit with 6F delay Move cannot be interrupted

3
Left Kick
mi15
i15~16
-7+4 / —14

3,2
Piston Fire
m ,hi15
,i23
-3+7 / +50a14 ,17

Move can be delayed 4f Input can be delayed 5f Combo from 1st hit with 5f delay Interrupt with i5 from 1st block Transition to t60 r19 SWA +4 +14g +57a at 43f with b

3,2~b
m,hi15
+4+14g / +57a14,17

Sidestep u can be buffered from 45f SWA attacks can be buffered from 54f Transition to cs1~ r9 -13 +4 +47a DPD from 61f with df

4
Right Kick
hi12
i12
-7+7 / +32d17

Balcony Break (CH only) Sometimes written Magic 4

1+2
Half-Step Phoenix Smasher
mi28
i28
-10+20d (+10) / —30

Balcony Break H.1+2 with Heat Move can be delayed 11f (i39) Charge begins on frame 1 Requires 1~27f charge Delayed startup from 17~27f charge Cancel to t27 r1 CS from 17~35f with f Cancel can be delayed 8f Sidestep u can be buffered 2f after cancel CS attacks can be buffered from 26f Decaying 13f delay on CS attacks Decays to 0 delay 24f after cancel Cancel to t41 r12 SWA from 17~35f with b Cancel can be delayed 8f Sidestep u can be buffered from 27f SWA attacks can be buffered from 26f 1+2* from 28~55f charge Burning Fist at 56f charge

1+2*
Half-Step Phoenix Smasher (Hold)
mi46
i46
+3+20d (+10) / —35

Balcony Break H.1+2* with Heat Chip damage (10) Move can be delayed 21f (i67) Charge begins on frame 1 Requires 28~55f charge Delayed startup from 35~55f charge Cancel to t27 r1 CS from 17~35f with f Cancel can be delayed 8f Sidestep u can be buffered 2f after cancel CS attacks can be buffered from 26f Decaying 13f delay on CS attacks Decays to 0 delay 24f after cancel Cancel to t41 r12 SWA from 17~35f with b Cancel can be delayed 8f Sidestep u can be buffered from 27f SWA attacks can be buffered from 26f 1+2 from 1~27f charge Burning Fist at 56f charge

1+2**
Burning Fist
m!i71
i71
+20d (+10) / —40

Balcony Break H.1+2** with Heat Charge begins on frame 1 Requires 56f charge 1+2 from 1~27f charge 1+2* from 28~55f charge

f+3
hi16
i16~17
-14+0 / —11

Homing

f+3,1
Lion's Tempest
h ,mi16
,i17
-13+12a (+3) / —11 ,21

Balcony Break Elbow Combo from 1st hit Interrupt with i1 from 1st block Move is delayed by 5F Move cannot be delayed Input cannot be delayed

f+3,2
Lion's Claw
h ,hi16
,i18~19
-7+17a (+8) / +32a (+24)11 ,24

Balcony Break Combo from 1st hit Interrupt with i2 from 1st block Move is delayed by 5F Move cannot be delayed Input cannot be delayed

f+1+2
Hammer of the Gods
mi20
i20~21
+3c+8c / +35d (+27)22

Balcony Break (CH only) Chip damage (4) Move can be delayed 9f (i29~30) Delayed startup from 5~23f charge f+1+2* at 24f charge H.f+1+2* at 24f charge Transition to ±0, +5c DPD with DF

f+1+2*
Hammer of the Gods (Hold)
mi29
i29~30
+7c+20d FDFA / +55a26

Balcony Break H.f+1+2* with Heat Chip damage (10) Requires 24f charge f+1+2 from 0~23f charge Transition to +4c, +17d DPD with DF

f+1+4
Shoulder Tackle
mi21
i21~23
-14+15cg / —25

Balcony Break Shoulder Sharp leftward movement w/ i5? startup Forces tech back roll on hit

f+3+4
Cormorant Step
sp—
/ —

Transition to CS

df+1
mi14
i14
-2+4 / —11

Transition to r15 SWA +3 +9 from 2~14f, 16f with b

df+1~b
mi14
+3+9 / —11

Sidestep u can be buffered from 16f SWA attacks can be buffered from 24f Transition to cs1~ r9 -1 -12 DPD from 32f with df

df+1,1
m ,hi14
,i20~21
-5+5 / +811 ,9

Combo from 1st hit with 4f delay Interrupt with i1 from 1st block Move can be delayed 10f Input can be delayed 11f

df+1,1,2
Lion's Roar
m,h ,mi14
,i22~23
-9+32a (+24) / —11,9 ,22

Balcony Break Combo from 2nd CH Interrupt with i3 from 2nd block

df+2
Kurenai
mi15
i15~16
-8+33a (+23) / —13

High evasion +4s on crouching normal hit

df+3
mi16
i16
-9+2 / —14

df+3,4
Phoenix Wings
m ,mi16
,i21~22
-10+6 / +59a14 ,17

Move can be delayed 10f Input can be delayed 13f Combo from 1st hit with 9f delay Interrupt with i4 from 1st block Whiffs vs SSR from 1st block

df+4
Tiger Claw
mi17
i17~18
-2+8 / +1417

Knee

df+3+4
Deep Dive
sp—
/ —

Transition to DPD

d+1
Hammer Punch
mi14
i14~15
-9+2 / +3c16

Spike Transition to r27 FC with d

d+1,2
Phoenix Smasher
m ,mi14
,i29
-17+20d (+10) / —16 ,26

Balcony Break H.d+1,2 with Heat Move can be delayed 14f (i43) Charge begins on frame 16 Requires 0~26f charge Delayed startup from 1~26f charge Combo from 1st CH with 0~6f charge (i30) d+1,2* at 27f charge Interrupt with i10 from 1st block

d+1,2*
Phoenix Smasher (Hold)
m ,mi14
,i43
+9+20d (+10) / —16 ,39

Balcony Break H.d+1,2* with Heat Chip damage (11) Charge begins on frame 16 Requires 27f charge d+1,2 from 0~26f charge Interrupt with i24 from 1st block Interrupt with i13 from 1st hit Interrupt with i9 from 1st CH Whiffs vs SS, SW from 1st block Whiffs vs SSR, SWR from 1st hit or CH

d+1,4
m ,Li14
,i19
-31c-17 / +14a FUFA16 ,15

Move cannot be delayed Input can be delayed 5f Combo from 1st CH with 5f delay Interrupt with i6 from 1st block Stagger low

d+1,4,2
Hang Over
m,L ,mi14
,i21
-14+3d (-6) / +35a (-12)16,15 ,21 (14)

Balcony Break Elbow Airborne combo from 2nd CH +11d (+4)

d+2
sli11
i11
-4+7 / —8

cs1~ from 6f d/db/df input hold OTG.d+2 when opponent is downed

d+4
Li15
i15
-31c+14a FUFA / +14a9

Clean Hit range 1.59 8 damage, -17 on hit without Clean Hit Stagger state on block

d+4,2
Bone Breaker
L ,mi15
,i21
-18-9 / —9 ,23

Elbow Move can be delayed 3f Input can be delayed 4f Combo from 1st CL with 3f delay +5d (-2) Combo from 1st CH with 3f delay +5d (-2)

d+4,2,1+2
Demolition Man
L,m ,mi15
,i26~27
-17+3d (-6) / +35a (-12)9,23 ,26

Balcony Break Move can be delayed 4f Input can be delayed 4f Combo from 1st CL with 4f delay +13d (+6) Combo from 1st CH with 4f delay +13d (+6) Combo from 2nd hit with 4f delay +13d (+6) Perfect input window 21~22f after 2 input Move cannot be interrupted Sometimes written Demoman

d+4,2:1+2
Demolition Man (Perfect Input)
L,m ,mi15
,i26~27
-17+3d (-6) / +35a (-12)9,23 ,30

Balcony Break Move can be delayed 1f Input can be delayed 1f Combo from 1st CL with 1f delay +13d (+6) Combo from 1st CH with 1f delay +13d (+6) Combo from 2nd hit with 1f delay +13d (+6) Perfect input window 21~22f after 2 input Perfect input increases damage, wall carry Move cannot be interrupted

d+1+2
Shoulder Smash
mi12
i12~13
-18+16d (+11) / +24d (+16)28

Balcony Break Shoulder Sometimes written Shoulder

db+1
Dickjab
sli10
i10
-5+6 / —5

Transition to r24 standing with f

db+2
Shoot the Moon
Mi19
i19~20
-11+14d (-3) FDFA / +28a (+18)21

Tornado Balcony Break

db+3
Li15
i15~i17
-18c-4 / —12

-4c on crouching hit

db+4
Li12
i12
-15c-4 / —6

db+1+2
Chain Breaker
Mi20
i20~21
-14+30a (+22) / —21

Shoulder -9 block advantage and 8 chip damage on block after attack absorption

b+1
hi12
i12~13
-9+2 / —10

b+1,2
Double Wing
h ,mi12
,i20~21
-14+16d (-1) FDFA / —10 ,21

Tornado Balcony Break Move can be delayed 5f Input can be delayed 5f Combo from 1st hit with 5f delay

b+2
mi18
i18
-5c+4c / —22

Spike

b+2,1
Crushing Wind
m ,mi18
,i36
-120c / +16d22 ,22

Move can be delayed 20f (i56) Charge begins on frame 18 Requires 0~41f charge Delayed startup from 22~41f charge Combo from 1st CH with 0~23f charge b+2,1* / H.b+2,1* at 42f charge

b+2,1*
Crushing Wind (Hold)
m ,Mi18
,i60~61
+8+20d / +56a22 ,27

Balcony Break H.b+2,1* with Heat Chip damage (7) Charge begins on frame 18 Requires 42f charge b+2,1 from 0~41f charge

b+3
Lights Out
hi14
i14~15
-6+31a (+25) / —16

Knee

b+4
Leg Sweep
Li20
i20~21
-12c+4 / +17g14

b+1+2
Hassou Strike
hi24
i24
-9+21d (+16) / —28

Balcony Break Chip damage (11) if attack is absorbed

b+3+4
Sway
sp—
/ —

Transitions to SWA SWA.1+2 can be performed immediately (i17~18 effective startup)

ub+2
Wrecking Ball
mi18
i18
-5+16d / —22

Balcony Break +21d (+14) on airborne opponent Can be charged to power up Has good left sidestep tracking

ub+2*
Wrecking Ball (charged)
mi27
i27
+1+17a / —30

Homing Balcony Break 9 chip damage

uf+1
Burning Spear
hi28
i28~31
-6+24a (+14) / —26

Balcony Break Elbow High Evasion .73 backward movement over first 14f Sometimes written b,F+1 Backswing Blow

uf+3
mi15
i15~16
-16+25a (+15) / —15

uf+3,4
Shredder
m ,mi15
,i13~14
-13+32a (+22) / —15 ,10

Jail from 1st block Combo from 1st hit +28a (+21)

uf+4
Rising Toe Kick
mi15
i15~17
-13+33a (+23) / —13

Sometimes written Hopkick

uf,n,4
Delayed Rising Toe Kick
mi23
i23~25
-13+32a (+22) / —20

Can be delayed 12f after jump Additional range with delay

f,F+2
mi15
i15~17
-17-7 / —14

Elbow Alternate input FC.df+2

f,F+2,1
Juggernaut
m ,mi15
,i26
-12+14a / —14 ,20

Balcony Break Combo from 1st hit Interrupt with i8 from 1st block Whiffs vs SWR from 1st block (SSL, SSR and SWL inconsistent depending on character) Cancel to -21 -11 standing r40 with B at frame 20 Alternate input FC.df+2,1

f,F+2:1
Phoenix Bone Breaker
m ,hi15
,i15
-1+37d (+11) / —14 ,24

Balcony Break Chip damage (7) Combo from 1st hit Input 1 on frames 14 to 19 Jails attack inputs from 1st block (movement buffering prioritized) Duckable Alternate input FC.df+2:1

f,F+2,2
Bulldozer
m ,Li15
,i36~38
-19c+27a / —14 ,21

Cancel to -28 -18 FC with B Interrupt with i18 from 1st block Whiffs vs SSL, SW from 1st block Alternate input FC.df+2,2

f,F+3
mi15
i15~16
-17+24a (+14) / —17

f,F+3,4
m ,mi15
,i13~14
-16+30a (+20) / —17 ,10

Airborne combo from 1st hit with 2F delay +27a (+10) Jail from 1st block with 2F delay Move cannot be delayed Input can be delayed by 2F

f,F+3,4,4
Double Hop Kick High
m,m ,hi15
,i23~25
-5+62a (+42) / —17,10 ,25

Balcony Break Interrupt with i11 from 1st block Whiffs vs SSR, SWR (inconsistent?) Move cannot be delayed Input can be delayed by 6F

f,F+3,4,f+4
Triple Kick Combo
m,m ,mi15
,i27~29
-14+12d (+3) / —17,10 ,18

Balcony Break Interrupt with i15 from 1st block Move cannot be delayed Input can be delayed by 6F

f,F+3,4,d+4
Double Hop Kick Low
m,m ,Li15
,i27~28
-17c-6 / —17,10 ,15

Interrupt with i15 from 1st block Whiffs vs SWL from 1st block Move cannot be delayed Input can be delayed by 6F

f,F+4
Neutron Bomb
Mi27
i27~34
+2+18a / —20

Chip damage (8)

f,f,F+2
Turbulent Hammer
m,ti18
i18~19
-9+0d FDFA / +35a FUFA19,29

Spike on 2nd hit Elbow Transition to throw on airborne hit +17d FDFA without throw transition

ws1
mi15
i15~16
-10-7 / +116

ws1,2
Enfolding Dragon
m ,mi15
,i20
-11+2 / +316 ,17

Move can be delayed 10f Input can be delayed 10f Combo from 1st CH with 10f delay Transition to t59 r19 SWA +1 +14g +15 from 39~44f with b

ws1,2~b
m,mi15
+1+14g / +1516,17

Sidestep u can be buffered from 44f SWA attacks can be buffered from 51f Transition to cs1~ r9 -10 +4 +5 DPD from 60f with df

ws2
Thunder Palm
mi15
i15~16
-14+27a (+17) / —20

ws3
Mi13
i13~14
-8+6 / —16

Knee

ws3,2
Shioh
M ,hi13
,i21~22
-7+17d (+8) / +46a16 ,21

Balcony Break Move can be delayed 12f Input can be delayed 12f Combo from 1st hit with 12f delay

ws4
Toe Smash
mi11
i11~12
-6+5 / —18

FC.D
Somersault Kick Warm-Up Moves
—
/ —

FC.D,U+4
Incomplete Somersault
m—
i13~18
-49d-9d (-24) / —40

Deals recoverable damage to self

R.df+1+2
Big Bang Phoenix Smasher
m,ti20
i20
-18+0d / —55+

Rage Art Removes Recoverable Health Reversal Break Damage increases with lower health, maximum 82 Restores recoverable health on hit Transition to attack throw on hit Consumes Rage 114f cinematic freeze on frame 8 t193 r56 on block t134 on whiff

1+2+3+4
Ki Charge
—
/ —

OTG.d+2
Down Strike
Li18
i18
-12c-1d (-9) / —16

Spike +4 on hit against standing opponent

b+1+3
Attack Reversal
—
+1d FUFA / —25

Parry

SS.1
Turn Thruster
hi20
i20
+8+35a (+27) / —21

Balcony Break Elbow Chip damage (6) Effective minimum startup 30f

SS.3
Pump In Pedal
Li19
i19
-12c+4 / +12c17

Effective minimum startup 28f

d,df
Crouch Dash
—
/ —

Cannot be buffered 1.12 movement over 20f Transition to CS from 2f with f Transition to r9 DPD from 3~19f with df Transition to r6? hFC with alternate input d,DF Cannot access stance moves Cancel to r1 block from 2f with b Cancel to r1 sidestep from 2f with u Sometimes written CD

d,df,f
Cormorant Step
—
/ —

Cannot be buffered t35 from 1+2~f Exits crouching state on frame 1 1.63 movement over 25f (includes CD) 1.98 movement over 35f from 1+2 cancel Transition to r9 DPD from 2f with df Cancel to r1 sidestep from 2f with u Cancel to r1 block from 24f with b Sometimes written CS qcf

CS.1
Thruster
hi16
i16~17
-4+33a (+26) / —21

Elbow Chip damage (4) Sometimes written qcf+1

CS.3
Gengetsu
Li18
i18~19
-14c+0 / +20a FUFA18

Clean hit range 2.0 17 damage on hit without Clean Hit +7 on CH without Clean Hit Sometimes written qcf+3

CS.1+2
Gunba
Li32
i32~33
-12c+71a (+55) T! / —20

Cancel to t41 FC with B Sometimes written qcf+1+2

CS.3+4
Mountain Raze
mi19
i19~20
-9+35a (+27) / +74a (+58) T!22

Tornado Balcony Break Knee High Evasion (brief) Sometimes written qcf+3+4

CD.df
Deep Dive
—
/ —

Buffer window 2~9f (3~9f from SWA) Sidestep can be buffered with u DPD attacks can be buffered While standing attacks can be buffered Cancel to r1 block from 10f with b Sometimes written DPD DD

DPD.df+1
Phoenix Axe
hi17
i17
-1+59a FUFA / —19

Strong Aerial Tailspin Homing Effective minimum startup 29f Sometimes written DPD.1 DD.1

DPD.df+2
mi14
i14
-10+6 / —10

Balcony Break Effective minimum startup 24f Sometimes written DPD.2 DD.2

DPD.df+2,1
Quick Petal Strike
m ,hi14
,i18~19
+4+23d FUFA / —10 ,30

Tornado Balcony Break Move can be delayed 10f Input can be delayed 17f Combo from 1st hit with 10f delay 9 chip damage on block Sometimes written DPD.2,1 DD.2,1

DPD.df+2,3
Quick Lightning Breaker
m ,Mi14
,i25~26
-13c+10d FDFA / +46a10 ,22

Spike Move can be delayed 10f Input can be delayed 17f Combo from 1st hit with 6f delay Sometimes written DPD.2,3 DD.2,3

DPD.df+4
Eigetsu
Li17
i17
-13+3 / +24d17

Effective minimum startup 27f Clean Hit range 1 Damage without clean hit 20 Sometimes written DPD.4 DD.4

DPD.df+3+4
Incomplete Somersault
m,Mi18
i18~23,i51~61
-49d-9d (-24) / —32,10

Effective minimum startup 28f t112 on hit Deals recoverable damage to self Sometimes written DPD.3+4 DD.3+4

d,db,b
Sway
—
/ —

Cannot be buffered Moves backward up to 1.04 Less movement against distant opponent cs1~10 against distant opponent Less movement from attack transition No crouching state from attack transition High evasion from attack transition Transition to r9 DPD from 2f with df Minimum 3f needed to enter (one for each directional) Sometimes written SWA qcb

SWA.1
God Hammer Punch
Mi21
i21~22
+0c+27d FDFA / +53a24

Floor Break Floor Breaks even on a standing or crouching opponent Chip damage (7) Sometimes written qcb+1

SWA.3
Rapid Fire
Li18
i18~19
-21c-10g / +21a14

Sometimes written qcb+3

SWA.3,2
L ,mi18
,i27~28
-10+6 / —14 ,20

Combo from 1st CH +20d (+13) Sometimes written qcb+3,2

SWA.3,2,1
Petal Strike
L,m ,hi18
,i18~19
-5+21d (-5) / —14,20 ,25

Tornado Combo from 1st CH +63a (+47) T! Sometimes written qcb+3,2,1

SWA.3,2,3
Lightning Breaker
L,m ,Mi18
,i25~26
-13c+10d FDFA / +46a14,20 ,22

Spike Combo from 1st CH +15d (-20) FDFA Move can be delayed 10f Input can be delayed 17f Sometimes written qcb+3,2,3

SWA.4
Kawaragoma
hi15
i15~16
+1+23d (+14) / +59a17

Homing Chip damage (6) Sometimes written qcb+4

SWA.1+2
Unseen Gust
mi16
i16~17
-14+37a (+27) / —22

Tornado Elbow High evasion Sometimes written qcb+1+2

1+3
Over The Shoulder
ti12
i12~14
-6+1d FUFA / —35

Homing Throw break 1 or 2 Side switch

2+4
Shoulder Pop
ti12
i12~14
-3+1d FUFA / —35

Homing Throw break 1 or 2 Side switch Transition to FUFT on hit

2+4~b
Chest Crusher
ti12
i12~14
-2+0d / —40

Homing Throw break 2

LeftThrow
Dragon Screw
ti12
i12~14
-3+1d FUFA / —45

Throw break 1

RightThrow
Fall Away
ti12
i12~14
-3-2d FUFA / —40

Throw break 2 Side switch

BackThrow.1+3
Reverse Neck Throw
ti12
i12~14
-14d FUFA / —50

Throw cannot be broken

BackThrow.2+4
Piggyback Throw
ti12
i12~14
+1d FDFA / —50

Spike Throw cannot be broken

df+1+3
Kongo Blast
ti12
i12~13
-2+9 / —22

Throw break 1

df+1+3,qcf+2
Kongo Blast > Phoenix Smasher
t ,mi12
,i13~14
+16d (-20) FDFA / —22 ,15

Balcony Break H.df+1+3,qcf+2 with Heat Strict qcf input required (d,F does not work) Perfect input window 55-56f Perfect input increases damage, wall carry

df+1+3:qcf+2
Phoenix Smasher (Perfect Input)
t ,mi12
,i13~14
+16d (-20) FDFA / —22 ,20

Balcony Break H.df+1+3:qcf+2 with Heat Strict qcf input required (d,F does not work) Perfect input window 55-56f Perfect input increases damage, wall carry

b+1+4
Foot Launch
ti11
i11
-2+6d FUFA / —40

Throw break 1 Side switch Transition to BT on hit

uf+1+2
Twist and Shout
ti12
i12
-6+0d / —40

Spike Throw break 1+2

f,F+1+2
Push Away
ti12
i12
+0 BT/+0 FUFA+20d / —38

Balcony Break Throw break 1+2 Side switch if broken +0 FUFA if broken at wall

hFC.1+2
Ultimate Tackle
ti26
i26
-5 BT+3d / —0

Throw break 1+2 Transition to Takedown on hit Can be done from Crouch Level 1

hFC.1+2,2,1,2,1
Ultimate Punch
ti26
,i26
+0d / —30

Throw break 1 or 2 Alternate input 1,2,1,2

hFC.1+2,1+2,1+2
Arm Breaker
ti26
,i26
-9+1d / —25

Throw break 1+2

hFC.1+2,2,d+1,1,1+2
Ultimate Punishment
ti26
,i26
+0d FDFA / —50

Throw break 1 Transition to Arm Breaker with 1+2 after third hit

Know where your buttons came from.

Offline source snapshot: November 5, 2026. These are documented routes and frame data, not a claim of in-game verification on the latest patch. Test your chosen tools in Practice. Unfinished placeholders, obsolete routes and fake-combo sections are omitted.

Wavu original contributions: CC0. Game content and fighter artwork belong to Bandai Namco. Official roster ↗